Ninja Foodi Banana Bread Recipe: Step-by-Step Guide
Banana bread is one of those classic treats everyone loves, and with the Ninja Foodi, it’s never been easier to make. This isn’t just another gadget, it combines air frying and baking, giving you a perfectly golden crust and a soft, moist inside.
In this guide, I’ll walk you through everything, from gathering your ingredients to that first bite of warm, delicious banana bread. So, let’s grab our aprons and get started!
Don’t have time to read? 🎧 Listen to our podcast instead! Click play below to enjoy the full episode on the go, and catch all the tips and insights in just a few minutes.
Ingredients You’ll Need
Before we dive into the actual baking process, let’s ensure you have all the ingredients required to make your Ninja Foodi banana bread. Here’s the shopping list:
- 3 ripe bananas
- 2 cups all-purpose flour
- 1 teaspoon baking soda
- 1/4 teaspoon salt
- 1/2 cup unsalted butter, softened
- 1 cup granulated sugar
- 2 large eggs
- 1 teaspoon pure vanilla extract
- 1/2 cup sour cream
- 1/2 cup chopped walnuts (optional, but highly recommended)
These ingredients are the building blocks of a delectable banana bread. The ripe bananas provide natural sweetness and moisture, while the sour cream and butter give it a rich and velvety texture. The optional walnuts add a delightful crunch and nutty flavor.
The Ninja Foodi Advantage
Now, you might be wondering, “Why use a Ninja Foodi for banana bread when I have my trusty oven?” Well, my fellow kitchen enthusiasts, the Ninja Foodi brings some fantastic benefits to the table:
Speed
The Ninja Foodi is all about speed. It can preheat and cook faster than traditional ovens, which is a real game-changer when time is of the essence in our fast-paced world. Picture this – you decide to bake banana bread on a whim, and with the Ninja Foodi, you’re sinking your teeth into a warm slice much sooner than with conventional ovens.
Versatility
The Ninja Foodi is like having a multitool for your kitchen. It’s not limited to baking; it’s a kitchen wizard that can air fry, roast, and even dehydrate. Whether you’re craving some crispy french fries or succulent roasted chicken, the Ninja Foodi can do it all. So, why not embrace the versatility and explore a world of culinary possibilities beyond just banana bread?
Even Cooking
The Foodi’s unique design ensures even heat distribution throughout the cooking process. No more worrying about hot spots or uneven baking. With the Ninja Foodi, you can trust that your banana bread will rise uniformly, develop a delightful golden crust, and maintain a consistent, moist interior. It’s like having a professional baker’s touch without the need for years of training.
Energy Efficiency
In our increasingly eco-conscious world, energy efficiency matters. The Ninja Foodi is more energy-efficient than a regular oven, meaning it can help you save on your electricity bills. So, while you’re relishing the mouthwatering results of your banana bread, you’re also being kinder to your wallet and the environment. It’s a win-win situation that you can savor with every bite.
Now, with the ingredients and the Ninja Foodi’s advantages laid out, let’s get into the nitty-gritty of making your banana bread..
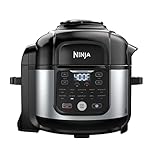
Ninja Foodi Air Fryer Pressure Cooker Combo 11-in-1 Pro
No products found.
| Pros | Cons |
|---|---|
| Versatility: With 11 programmable cooking functions, it can perform multiple tasks, from pressure cooking to air frying, baking, and even dehydrating, making it a one-stop solution for various cooking needs. TenderCrisp Technology: The combination of pressure cooking and air frying ensures meals are juicy inside while achieving a crispy exterior, enhancing the overall taste and texture of dishes. Large Capacity: The 6.5-quart cooking pot and 4.6-quart air frying plate provide ample space, allowing you to cook large portions like a 5-lb chicken or 3 lbs of French fries, perfect for family gatherings. | Bulky Size: Due to its large capacity and multiple features, it may take up significant counter or storage space, which can be a drawback for smaller kitchens. Learning Curve: With 11 functions and numerous settings, it may take time to get accustomed to the various options, especially for beginners or those unfamiliar with multifunctional kitchen appliances. Heavy Weight: The pressure cooker and air fryer’s solid build, including stainless steel components, can make it quite heavy, which may be inconvenient when moving or cleaning. |
Experience culinary versatility like never before with the Ninja FD302 Foodi 11-in-1 Pro 6.5 qt. Pressure Cooker & Air Fryer. This kitchen powerhouse is capable of pressure cooking, air frying, steaming, slow cooking, searing, sautéing, dehydrating, and much more. The 4.6 qt. Cook & Crisp Plate adds a delightful crunch to your creations, while the stainless steel nesting broil rack optimizes cooking space and stores easily. With a sleek design and an accompanying recipe book for inspiration, this Ninja appliance will become your go-to kitchen companion. Elevate your cooking game and save time with the Ninja Foodi 11-in-1 Pro.
Ninja Foodi Programmable 10-in-1 5-Quart
- TenderCrisp: Pressure Cook + Air Fry all In One Pot
- 10 programmable cooking functions including Dehydrate, Broil, Bake/Roast
- 5-qt Nonstick pot & 4-qt Cook & Crisp for up to a 4-lb chicken or 2 lbs fries
| Pros | Cons |
|---|---|
| Versatile Functions: The Ninja Foodi offers 10 cooking functions for a wide range of meal options. Space-Efficient: Compact 5-quart design is suitable for smaller kitchens or limited countertop space. TenderCrisp Technology: Seamlessly transition from pressure cooking to air frying for crispy results with less fat. | Limited Capacity: May not be ideal for larger families or those who frequently cook in bulk. Touch Controls Learning Curve: Users might need time to adapt to the touch controls and navigate the various functions. Renewed Product: While inspected and certified, some may prefer brand-new appliances for peace of mind. |
Take your cooking to the next level with the Ninja Foodi 10-in-1 5-Quart Pressure Cooker and Air Fryer. This super versatile gadget can handle everything from pressure cooking to air frying and more, all in one. With a 5-quart capacity, it’s great for making family meals, and the TenderCrisp Technology gives you that perfect crispy outside with a tender inside. Plus, the stainless steel design looks great in any kitchen and is built to last. It’s the perfect tool to make cooking easier and more fun!
Ninja Foodi 10-in-1 Pressure Cooker
- The stainless steel pressure cooker that crisps. TenderCrisp Technology lets you quickly pressure cook to lock in juices then swap lids for a crispy, golden air fry finish.
- 10-in-1 versatility lets you pressure cook, slow cook, steam, make yogurt, sear/sauté, air fry crisp, bake/roast, broil, dehydrate, and keep foods warm inside the pot.
- Stainless steel nesting broil rack lets you steam, broil, and add a layer of capacity and it easily stores inside the cooking pot.
| Pros | Cons |
|---|---|
| Versatility: This Ninja Foodi cooker offers remarkable versatility with 10 cooking functions, making meal preparation effortless. TenderCrisp Technology: TenderCrisp Technology ensures dishes are perfectly cooked, tender inside and crispy outside, ideal for various recipes. Time and Space Saving: This appliance cooks 70% faster than traditional methods and its compact design saves kitchen space, making meal prep more efficient. | Price: Despite its features, the Ninja Foodi 10-in-1 Pressure Cooker and Air Fryer might seem expensive compared to simpler models. Learning Curve: Users unfamiliar with multi-cookers may face a learning curve, needing time to master all the functions. Size: The 6.5-quart capacity may not be enough for big families or gatherings, limiting the amount of food prepared at once. |
The Ninja OS301/FD305CO Foodi 10-in-1 Pressure Cooker and Air Fryer is the ultimate kitchen appliance for culinary enthusiasts. This versatile powerhouse boasts a 6.5-quart capacity, making it ideal for families and gatherings. Its sleek stainless finish adds a touch of sophistication to your kitchen. With 10 cooking functions, it effortlessly handles everything from pressure cooking to air frying. The included nesting broil rack maximizes your cooking space, allowing you to create multi-layered, flavorful dishes. Whether you’re pressure cooking, air frying, or broiling, the Ninja Foodi delivers exceptional results and simplifies meal prep
Step 1: Gather Your Ingredients
Let’s start at the very beginning. The key to a successful culinary journey often begins with organization. Before you dive into this delightful banana bread adventure, it’s essential to gather all your ingredients and equipment. Having everything within arm’s reach will make the entire process smoother and more enjoyable. Trust me, when it comes to baking, being prepared is half the battle. So, take a few moments to ensure that you have everything you need lined up and ready to go.
Step 2: Prepare the Ninja Foodi
Now, it’s time to prepare your Ninja Foodi, your trusty kitchen companion in this banana bread venture. The Ninja Foodi is more than just a kitchen gadget; it’s a versatile appliance that will add a touch of magic to your banana bread. Set it to the “Bake” function and preheat it to 350°F (175°C). This preheating step is crucial for ensuring that your banana bread bakes evenly and thoroughly, resulting in a perfect balance of texture and flavor. The Ninja Foodi’s baking function is designed to provide consistent, reliable results, making it an excellent choice for your baking needs.
Step 3: Mix the Wet Ingredients
In a mixing bowl, we embark on the journey of creating the flavorful wet mixture for our banana bread. Begin by mashing the ripe bananas until they transform into a creamy puree. Overripe bananas, with their brown spots, are ideal, as they contribute natural sweetness and a delightful texture to your bread.
Once your bananas are perfectly mashed, add the softened butter, sugar, eggs, pure vanilla extract, and sour cream to the bowl. Mixing these ingredients thoroughly is crucial to ensure a smooth and well-combined wet mixture. The butter adds richness, while the sugar provides sweetness, and the eggs act as binding and leavening agents. Pure vanilla extract adds an aromatic essence, and sour cream keeps your banana bread wonderfully moist.
Step 4: Combine Dry Ingredients
In a separate bowl, it’s time to prepare your dry mixture. Start by combining two cups of all-purpose flour, a teaspoon of baking soda, and a quarter teaspoon of salt. This blend of ingredients will be the backbone of your banana bread, providing structure and that perfect crumb. Baking soda, in particular, plays a critical role in helping your bread rise and achieve its delightful fluffiness.
Step 5: Incorporate the Wet and Dry Mixtures
Here’s where the magic truly begins to happen. Gradually introduce the dry mixture into the wet mixture, stirring gently but thoroughly. The aim is to create a smooth, consistent batter, with no large lumps remaining. This seamless integration of the wet and dry ingredients will ensure that your banana bread is both flavorful and beautifully textured.
Step 6: Add the Magic Ingredient
Now, it’s time to add a special touch to your banana bread – the chopped walnuts. While this step is optional, it is highly recommended for those seeking an extra layer of texture and a delightful nuttiness in every bite. Carefully fold the chopped walnuts into the batter, ensuring even distribution. These walnuts will provide a satisfying crunch and a wonderful contrast to the softness of the bread.
Step 7: Load the Banana Bread Mixture
With your banana bread batter perfectly blended and ready, it’s time to transfer it to a greased loaf pan. Ensuring that the mixture is evenly spread within the pan is crucial to achieve a consistent bake. This step sets the stage for the banana bread to rise beautifully and acquire that golden brown crust we all love.
Step 8: Set Up the Ninja Foodi
Carefully transfer the loaded loaf pan into your preheated Ninja Foodi. At this point, you’re setting the stage for the final act of baking perfection. Set the Ninja Foodi’s timer to 35-40 minutes, and then, let the Foodi work its magic. The even heat distribution and precise temperature control of the Ninja Foodi’s Bake function ensure that your banana bread bakes consistently and beautifully.
Step 9: Cook to Perfection
As your banana bread begins its transformation in the Ninja Foodi, take a moment to savor the mouthwatering aroma that fills the air. The Ninja Foodi’s ability to maintain a consistent temperature without hot spots or uneven baking ensures that your banana bread will be a masterpiece of flavor and texture.
Step 10: Enjoy Your Delicious Banana Bread
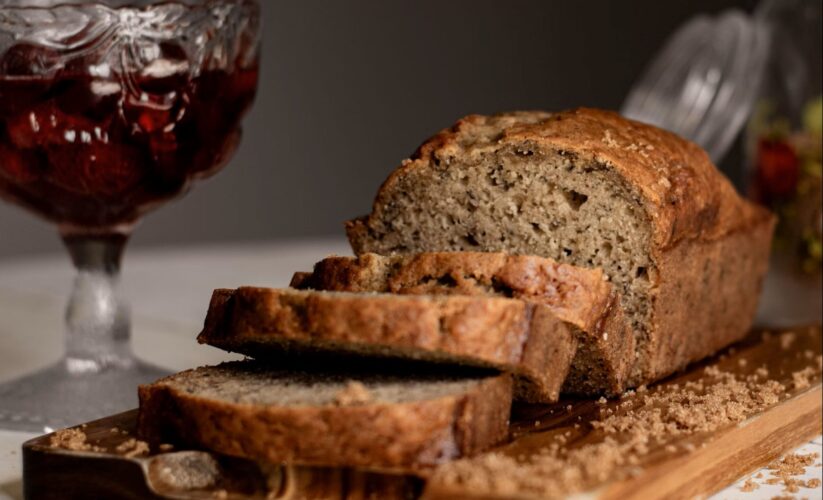
The moment you’ve been waiting for has arrived. Once the timer goes off, carefully remove the loaf pan from the Ninja Foodi. While the temptation to indulge right away may be strong, allow your banana bread to cool for a few minutes before slicing. Patience is rewarded in the form of a perfect, moist, and flavorful banana bread. Slice yourself a piece of this heavenly creation, and you’ll understand why this recipe is worth every effort.
Tips and Tricks
- Experiment with Add-Ins: Feel free to customize your banana bread by adding chocolate chips, dried fruits, or a swirl of cinnamon and brown sugar.
- Storage: To keep your banana bread fresh, wrap it in plastic wrap and store it in an airtight container.
- Serving: A warm slice of banana bread with a dollop of vanilla ice cream is pure indulgence.
- Freezing: You can freeze slices of banana bread for later enjoyment. Just wrap them individually and store in a freezer-safe bag.
- Share the Love: This Ninja Foodi banana bread makes an excellent gift. Wrap it up beautifully and surprise your loved ones.
Conclusion
In the world of homemade treats, banana bread is a beloved classic. When you add the Ninja Foodi into the mix, you get an extra layer of convenience and a delightful twist on tradition. From the preheating to the final result, the Ninja Foodi makes the process smoother and more enjoyable. The speed, versatility, and even cooking of the Foodi make it an ideal choice for baking enthusiasts.
So, the next time you have ripe bananas sitting on your counter, don’t just settle for ordinary banana bread. Take your baking skills to the next level with the Ninja Foodi. It’s a game-changer that will leave your taste buds craving for more. Happy baking!
Frequently Asked Questions
Q1: Can I use frozen bananas for this recipe?
While it’s best to use ripe, unfrozen bananas for optimal flavor and texture, you can thaw frozen bananas and use them if needed.
Q2: Can I replace sour cream with yogurt?
Yes, you can substitute sour cream with plain yogurt. It will still provide moisture and a creamy texture.
Q3: What’s the purpose of mashing the bananas?
Mashing the bananas creates a creamy consistency and ensures that their sweet flavor is evenly distributed throughout the bread.
Q4: Do I need to use a specific loaf pan for this recipe?
No, you can use a standard 9×5-inch loaf pan for this recipe.
Q5: Can I make this recipe in a regular oven if I don’t have a Ninja Foodi?
Absolutely! Just preheat your oven to 350°F (175°C) and follow the same steps for a delicious banana bread.
Last update on 2026-02-18 / Affiliate links / Images from Amazon Product Advertising API
*We may earn a commission for purchases made using our links. Please see our disclosure to learn more.
