Ninja Creami Pints
The Ninja Creami has taken the kitchen gadget world by storm, making it easier than ever to create delicious homemade ice creams, sorbets, gelato, and other frozen treats right from the comfort of your kitchen. At the heart of this innovative machine are the pints, those essential containers that hold the magic of your ingredients. Whether you’re new to the Ninja Creami or simply looking to maximize your ice cream-making adventures, understanding these pints is key.
In this comprehensive guide, we’ll explore everything you need to know about Ninja Creami pints, from their design and functionality to tips for getting the most out of your machine. Whether you’re an ice cream aficionado eager to experiment with flavors or just starting your journey into homemade desserts. This guide will equip you with the knowledge you need to enhance your Ninja Creami experience.
Don’t have time to read? 🎧 Listen to our podcast instead! Click play below to enjoy the full episode on the go, and catch all the tips and insights in just a few minutes.
Key Takeaways
- Understanding the Basics: Ninja Creami pints are specially designed containers that play a crucial role in the ice cream-making process. They come in various sizes, typically 16 oz. Allowing you to create perfect portions for yourself or share with family and friends. The unique shape of these pints ensures optimal freezing and an even consistency in your frozen treats.
- Material and Durability: Made from high-quality, BPA-free plastic, Ninja Creami pints are not only durable but also designed to withstand extreme cold temperatures. This material helps maintain the integrity of your frozen mixtures while being easy to handle. To ensure longevity, it’s important to follow care instructions, hand washing is recommended to preserve the quality of the pints.
- Using Ninja Creami Pints: To achieve the best results, fill the pints with your chosen ice cream base, ensuring not to overfill, as mixtures expand when frozen. Place the filled pints in the freezer for a minimum of 24 hours to ensure they are fully frozen before processing in the Ninja Creami. Cleaning is simple: after use, rinse the pints and lids thoroughly, and allow them to air dry before storing.
- Best Practices: To prevent common pitfalls in ice cream making, it’s crucial to follow the Ninja Creami’s guidelines closely. Ensure your mixtures are well-blended and chilled before freezing, and always let the machine work through its cycle without interruption for the creamiest results. Experiment with different textures by adjusting the processing time based on your preferences.
- Customization and Accessories: The Ninja Creami allows for endless customization possibilities! Expand your pint collection by purchasing additional pints, allowing you to make multiple flavors at once. Explore accessories such as interchangeable lids or even flavor infusion kits to elevate your creations and impress your friends and family.
What Are Ninja Creami Pints?
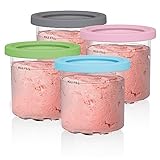
- GENIUNE NINJA CREAMI PINTS: Ensure optimal performance.
- MAKE MORE FROZEN TREATS: Use 4 additional pints to store all your CREAMi frozen treats like ice cream, gelato, sorbet, and more.
- USE-AFTER-USE: Reusable to create endless frozen treats and delights right in your CREAMi pints.
- GENIUNE NINJA CREAMI PINTS: Ensure optimal performance.
- MAKE MORE FROZEN TREATS: Use 2 additional pints to store all your CREAMi frozen treats like ice cream, gelato, sorbet, and more.
- USE-AFTER-USE: Reusable to create endless frozen treats and delights right in your CREAMi pint.
- Compatibility: This 16oz pint will ONLY fit the NC300, NC301, CN305A, CN301CO, and NC299AMZ Series Ninja creami ice cream makers. It will NOT fit the NC500 or NC501 Series. Please be sure to carefully check your machine model before purchasing
- Sealed Lid Design: Upgraded sealed lid keep frozen foods fresh for a long time and prevent leaks and spills. These durable ice cream cups are made from BPA-free PC materials that is heat resistant. Relax and enjoy your delicious food
- Easy To Clean: Crafted from heat and cold-resistant materials, our containers and LIDS can effortlessly withstand temperatures from -22 °F to 302 °F(-30 °C to 152 °C). After use, simply place the cups on the top dishwasher shelf for easy cleaning
- [Compatibility] Expertly designed for the Ninja Creami NC299 NC300 and NC301 series, this attachment guarantees perfect compatibility with these models, offering unmatched versatility for a smooth, effortless, and premium ice cream-making experience.
- [Additional Pint Containers] Made from high-quality, BPA-free plastic, these durable and reusable pint containers come with matching lids. With 4 pints included, you can easily store more of your homemade ice cream. Plus, we’ve added 4 spoons and writable labels for easy serving and flavor tracking! Perfect for convenience and creativity.
- [Dishwasher Safe & BPA-Free] The pints and lids are crafted from BPA-free, ensuring both safety and peace of mind for you and your family. They are dishwasher-safe, making cleanup quick and hassle-free after every use. Built to withstand repeated use, these durable, reusable containers are perfect for long-lasting storage and easy maintenance.
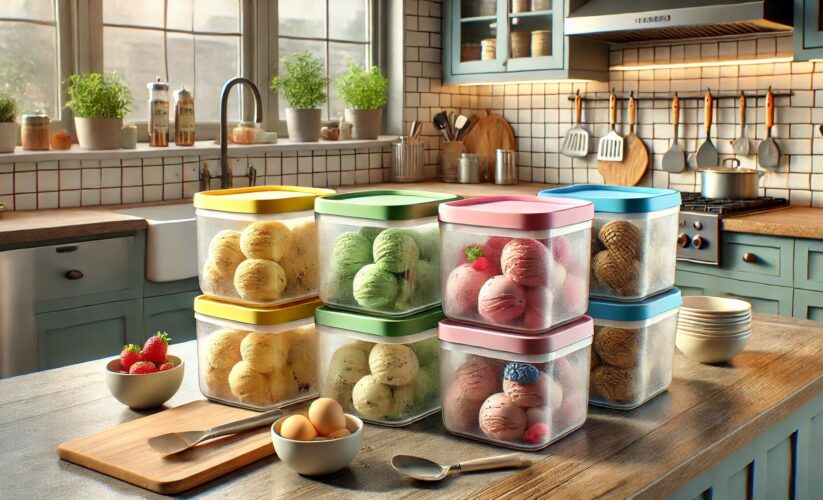
Ninja Creami pints are the go-to containers for the Ninja Creami, a handy kitchen gadget that lets you whip up all kinds of frozen desserts, like ice cream, gelato, and sorbet. Each pint holds 16 fluid ounces, making it perfect for a personal treat or a small batch of dessert. Whether you’re craving a sweet snack for yourself or serving a little something special at a small gathering, these pints are just the right size.
What makes Ninja Creami pints even better is their practical design. They come with lids to keep your desserts fresh and free from any weird freezer smells. The lids are easy to pop off, so you can dive into your treat whenever you want. Plus, you can label them with the flavor and date, making it super easy to keep your freezer organized.
Why Are Ninja Creami Pints Special?
What sets Ninja Creami pints apart from standard plastic containers is their unique construction and functionality. Crafted from BPA-free plastic, these pints are specifically designed to be safe for food storage, giving you peace of mind when making treats for your family and friends. The material is not only safe but also remarkably durable, ensuring the pints can withstand the intense pressures and freezing temperatures involved in the Ninja Creami’s operation.
The pints are engineered to be scratch-resistant, meaning they can endure the wear and tear of the blending and freezing processes without cracking or breaking. Unlike regular plastic containers that might warp or degrade, Ninja Creami pints are built to handle the powerful motor and blades of the machine, maintaining their shape and integrity over time. This durability makes them a reliable choice for frequent use, allowing you to experiment with different recipes and flavors without worrying about the longevity of your containers.
In essence, Ninja Creami pints are an essential component of the Ninja Creami experience, elevating your ability to create and store homemade frozen desserts with ease and confidence.
Benefits of Ninja Creami Pints
- Durability: Made from high-quality materials that are built to last, these pints can endure frequent use without deteriorating.
- Safety: BPA-free construction ensures no harmful chemicals will leach into your food.
- Convenience: The compact size is perfect for small freezers and fits neatly into the Ninja Creami machine.
- Reusable: Unlike disposable containers, these pints are reusable, making them an environmentally friendly option.
- Ease of Use: Clear measurements and a wide opening make filling and scooping a breeze.
How to Use Ninja Creami Pints Effectively
Using your Ninja Creami pints effectively is key to making the best possible frozen desserts. Here are some tips to ensure your creations turn out perfectly every time:
1. Filling Your Pints
When filling your Ninja Creami pints, it’s important to leave some space at the top, about ½ inch from the rim. This extra space is crucial as it allows the contents to expand as they freeze without spilling over. To achieve a smooth and consistent texture, mix your ingredients thoroughly before pouring them into the pint. Whether you’re using a base of heavy cream, milk, or alternative ingredients, ensuring everything is well combined will help with even freezing and a delightful creamy result.
2. Freezing Properly
Once your pints are filled, securely place the lid on each container to protect the mixture from freezer odors and maintain freshness. For optimal results, the Ninja Creami works best when the mixture is completely frozen solid, so allow at least 24 hours for freezing. It’s worth noting that certain mixtures, particularly those with higher sugar or alcohol content, may take longer to freeze. To check if your mixture is ready, gently shake the pint; if you feel sloshing, it likely needs more time in the freezer.
3. Operating the Machine
Before processing your frozen mixture, carefully remove the pint from the freezer and take off the lid. The Ninja Creami employs a unique blade system that spins the pint to shave and churn the frozen mixture into a creamy consistency. It’s important to follow the instructions on your Ninja Creami machine for the specific dessert you’re making, whether it’s ice cream, sorbet, or gelato. Each dessert may have slightly different processing times or speed settings, so refer to your user manual for the best results.
4. Cleaning Your Pints
Cleaning your Ninja Creami pints is a breeze! After using them, wash them with warm, soapy water to remove any residual ingredients. They are also dishwasher safe, making cleanup even easier for those who prefer a hands-off approach. Just be sure to ensure the pints are thoroughly dry before using them again; any leftover moisture can freeze into your dessert, potentially altering its texture. Proper care will extend the life of your pints and keep them looking new for all your future ice cream adventures.
Best Practices for Using Ninja Creami Pints
To get the most out of your Ninja Creami pints, consider these best practices:
- Avoid Overfilling: Overfilling can lead to overflow during freezing and processing, which can create a mess and affect the texture of your dessert.
- Label Your Pints: If you’re making multiple flavors, labeling your pints with the flavor and date can help you keep track of what you have and when it was made.
- Avoid Freezer Burn: Make sure lids are on tight to prevent freezer burn, which can negatively impact flavor and texture.
- Experiment with Ingredients: One of the best parts of owning a Ninja Creami is experimenting with different ingredients. Try adding mix-ins like chocolate chips, nuts, or fruit after the initial blend for variety and texture.
Customization and Accessories
The Ninja Creami’s versatility extends beyond just making ice cream. With the right accessories and extras, you can expand your culinary repertoire and create a wider variety of treats.
1. Extra Pints
Investing in extra pints can be a game-changer, especially if you enjoy making multiple flavors or experimenting with new recipes. Having several pints allows you to have a rotating selection of desserts ready to go at any time. You can find sets of additional pints on Amazon, ensuring you always have a clean one on hand.
2. Lids and Storage
If you find yourself with extra pints, you might also want to invest in additional lids. Extra lids make it easier to store your creations without worrying about losing freshness. Some users even label their lids for easy identification.
3. Replacement Parts
Over time, parts like the lids or even the pints themselves might need replacing due to wear and tear. It’s a good idea to keep an eye on their condition and have replacements available so you’re never without a fully functional machine.
Troubleshooting Common Issues
While the Ninja Creami pints are generally straightforward to use, you might occasionally encounter some challenges. Here’s how to solve some common problems:
1. Mixture Not Freezing Properly
If your mixture isn’t freezing properly, it might be due to an incorrect ingredient ratio or insufficient freezing time. Make sure to follow the recipe closely and allow enough time for the mixture to freeze solid.
2. Ice Cream Too Hard or Soft
The texture of your ice cream can vary based on the ingredients used. For a softer texture, consider adding a bit more sugar or alcohol, which lowers the freezing point. If the ice cream is too soft, try reducing these ingredients.
3. Machine Struggles to Blend
If your Ninja Creami seems to struggle while blending, it could be due to an overfilled pint or overly hard mixture. Make sure the pint is not filled beyond the recommended line and that the mixture isn’t too dense or frozen too hard. Letting the pint sit at room temperature for a few minutes before processing can help.
Conclusion
Ninja Creami pints are not just containers, they are the most important tools that you need to make your frozen dessert at home. In this way, reading this guide, you will learn how to use them properly and make ice creams, sorbets and gelatos. With the tips given here, you are now prepared to rule the world of frozen desserts made right in your kitchen.
When you fill your pints, make sure that you leave some space at the top of the pint for it to accommodate for expansion and ensure that your mixtures are allowed to freeze well. This attention to detail will ensure that every batch turns out perfect in terms of texture and taste. Ninja Creami is a great way to start something new and innovative, do not be afraid to try out different flavors and additions of fruits, nuts or any other ingredients.
With every scoop, you will be able to treat your loved ones and friends with the homemade desserts that you have made. Even better, cleaning them is a piece of cake! They can be washed with a little bit of warm soapy water or you can put them in the dishwasher and they are good to go for the next flavor. When starting your frozen dessert making process, it is important to have a good time making them.
Welcome to the world of Ninja Creami pints, and with it comes the tools to create some mouth-watering desserts that are perfect for any occasion. So begin your journey, enjoy the process and indulge in every bite of these sweet treats.
FAQs
1. Can I use regular plastic containers instead of Ninja Creami pints?
No, it’s recommended to use the pints designed for the Ninja Creami as they are specifically made to handle the machine’s powerful motor and blades.
2. Are Ninja Creami pints dishwasher safe?
Yes, Ninja Creami pints are dishwasher safe. However, washing them by hand with warm soapy water can extend their life.
3. How many pints does the Ninja Creami machine make?
The standard Ninja Creami machine usually comes with a set of one or two pints, but this can vary depending on the model and retailer.
4. Can I purchase additional pints separately?
Yes, additional pints can be purchased separately on Amazon or directly from the Ninja Kitchen website.
5. Why is my ice cream not coming out creamy?
If your ice cream isn’t creamy, it could be due to improper freezing, incorrect ingredient ratios, or over-processing. Try adjusting these factors for better results.
Last update on 2026-01-29 / Affiliate links / Images from Amazon Product Advertising API
*We may earn a commission for purchases made using our links. Please see our disclosure to learn more.

