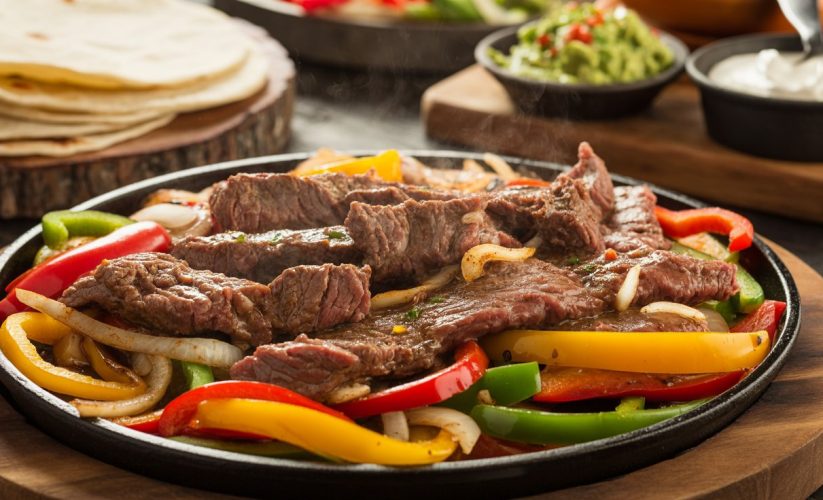
Quick Ninja Crispi Beef Fajitas Recipe (15 Minutes)
The Ninja Crispi has revolutionized home cooking by combining the convenience of an air fryer with the versatility of a multi-cooker. One standout recipe that showcases this appliance’s capabilities is beef fajitas—a dish that traditionally requires careful timing and multiple pans but becomes surprisingly simple with the right approach. These fajitas deliver restaurant-quality sizzle and flavor in a fraction of the time, making them perfect for busy weeknights when speed and taste both matter.
“The key to perfect fajitas is high heat and quick cooking—you want caramelization, not steaming. That’s where appliances like the Ninja Crispi excel, giving home cooks restaurant-quality results.”
— Culinary Institute of America, Modern Cooking Techniques
Key Takeaways
- Cooking time: Beef fajitas in the Ninja Crispi take approximately 12-15 minutes from start to finish
- Perfect texture: The Crispi achieves caramelized edges on vegetables and tender, juicy beef strips
- One-pan convenience: Everything cooks together, minimizing cleanup time
- Customizable heat levels: Adjust seasonings to personal preference for mild to spicy variations
- Meal prep friendly: Components can be prepped ahead for even faster execution

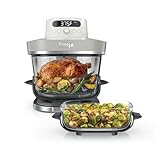
- ALL-IN-ONE SYSTEM: Includes the Ninja Crispi PowerPod, 4-qt and 6-cup CleanCrisp glass containers, and 2 storage lids
- CRISPI POWERPOD: The power of a full-sized air fryer now in the palm of your hand
- SMALL & LARGE BATCH CONTAINERS: 6-cup container cooks a personal sized meal in 7 mins while the 4 QT fits a 4-LB chicken and veggies

- FAMILY-SIZED COOKING SYSTEM: 6-qt and 2.5-qt glassware, storage lids, crisper plates, and modular base for any occasion.
- POWERFUL COOKING SYSTEM: 1800-watt air fryer that can cook a 7.5-lb chicken, feeding up to 10 people.
- VERSATILE CAPACITY: Modular base adjusts to fit 2.5-qt, 4-qt, and 6-qt CleanCrisp Glassware for everyday or family-sized meals.

- ALL-IN-ONE SYSTEM: Includes the Ninja Crispi PowerPod, 4-qt and 6-cup CleanCrisp glass containers, and 2 storage lids
- CRISPI POWERPOD: The power of a full-sized air fryer now in the palm of your hand
- SMALL & LARGE BATCH CONTAINERS: 6-cup container cooks a personal sized meal in 7 mins while the 4 QT fits a 4-LB chicken and veggies
- FAMILY-SIZED COOKING SYSTEM: 6-qt and 2.5-qt glassware, storage lids, crisper plates, and modular base for any occasion.
- POWERFUL COOKING SYSTEM: 1800-watt air fryer that can cook a 7.5-lb chicken, feeding up to 10 people.
- VERSATILE CAPACITY: Modular base adjusts to fit 2.5-qt, 4-qt, and 6-qt CleanCrisp Glassware for everyday or family-sized meals.
Why the Ninja Crispi Works for Fajitas
The Ninja Crispi’s dual functionality makes it ideal for fajitas. The air crisp setting circulates hot air at high velocity, creating the characteristic char on peppers and onions while keeping beef strips tender. Unlike stovetop cooking where ingredients often steam rather than sear, the Crispi’s design ensures proper caramelization without overcooking.
The compact cooking chamber also concentrates heat efficiently, reducing total cook time compared to traditional methods. This means less time standing over a hot stove and more time enjoying the meal with family. The temperature control remains consistent throughout cooking, eliminating the guesswork that comes with stovetop methods where heat fluctuates based on burner settings and pan thickness.
Another advantage is the hands-off nature of the cooking process. Once ingredients are loaded into the basket, the Crispi handles the work. There’s no need for constant stirring or monitoring—just a quick toss halfway through ensures even cooking. This frees up time to prepare accompaniments, set the table, or simply relax.
Essential Ingredients
For the Beef
The foundation of excellent fajitas starts with the right cut. Flank steak or skirt steak work best due to their grain structure and flavor profile. These cuts become tender when sliced against the grain into thin strips, typically about ¼-inch thick. Sirloin can also work as a leaner alternative, though it may be slightly less flavorful.
Plan for approximately 1 to 1.5 pounds of beef for a family of four. This provides generous portions while leaving room for vegetables in the basket. The beef should be trimmed of excess fat, though some marbling enhances flavor and prevents the meat from drying out during the high-heat cooking process.
Vegetables
Bell peppers and onions form the classic fajita base. A mix of colored peppers—red, yellow, and green—adds visual appeal and subtle flavor variations. Red and yellow peppers tend to be sweeter, while green peppers offer a slightly bitter, more vegetal note. Slicing them into uniform strips ensures even cooking.
Yellow or white onions work equally well. Yellow onions provide a balance of sweetness and sharpness, while white onions deliver a more pungent flavor that some prefer in Mexican cuisine. Slice onions into strips similar in size to the peppers for cooking consistency.
Seasoning Mix
A proper fajita seasoning blend typically includes chili powder, cumin, paprika, garlic powder, onion powder, oregano, salt, and pepper. These spices create the signature smoky, slightly spicy flavor profile associated with fajitas. Pre-made fajita seasoning packets work in a pinch, but homemade blends allow for customization and often deliver fresher, more vibrant flavors.
For a single batch, combine 2 teaspoons chili powder, 1.5 teaspoons cumin, 1 teaspoon paprika, 1 teaspoon garlic powder, 1 teaspoon onion powder, ½ teaspoon oregano, and salt and pepper to taste. This creates enough seasoning for 1.5 pounds of beef and vegetables. Store extra seasoning in an airtight container for future use.
Oil and Acid
A tablespoon or two of oil helps seasonings adhere to the meat and vegetables while promoting browning. Avocado oil or vegetable oil work best due to their high smoke points. Lime juice adds brightness and helps tenderize the beef when used in a quick marinade. Fresh lime juice is preferred over bottled for optimal flavor.
Step-by-Step Preparation
Prep Work
Begin by slicing the beef against the grain into thin strips. This step is crucial—cutting against the grain shortens the muscle fibers, resulting in more tender meat. To identify the grain, look for the direction the muscle fibers run, then cut perpendicular to those lines. Pat the beef dry with paper towels to promote better browning by removing surface moisture.
Slice peppers and onions into strips roughly the same width as the beef, approximately ¼ to ⅓ inch thick. Uniform sizing ensures everything finishes cooking simultaneously. Remove seeds and membranes from peppers for a cleaner flavor and easier eating.
Marinating
While not strictly necessary, a quick 15-30 minute marinade enhances flavor penetration and adds tenderness. Combine the juice of one lime, a tablespoon of oil, and half the seasoning mix in a bowl. Toss the beef strips in this mixture and set aside at room temperature while preparing other ingredients. For deeper flavor, marinate for up to 2 hours in the refrigerator, though this extends total preparation time.
Loading the Crispi
Toss the beef and vegetables with the remaining oil and seasonings in a large bowl. The oil helps seasonings adhere and promotes browning. Use hands or tongs to ensure even coating—every piece should have visible seasoning coverage.
Transfer everything to the Crispi basket, spreading ingredients in a relatively even layer. Some overlap is acceptable since the circulating air reaches all surfaces, but extreme overcrowding should be avoided. If working with more than 1.5 pounds of protein and vegetables combined, consider cooking in two batches for optimal results.
Cooking Process
Set the Ninja Crispi to Air Crisp mode at 400°F. Cooking typically takes 12-15 minutes total, but timing varies based on preferred doneness and vegetable texture preferences. The high temperature is essential for achieving the characteristic char and caramelization that defines great fajitas.
First Stage
Cook for 8 minutes without opening the unit. This initial blast of heat begins the browning process and starts breaking down the vegetables’ cellular structure. During this time, the beef begins to sear, developing a flavorful crust while the interior cooks through.
Stirring
Open the basket and stir the contents thoroughly using tongs or a heat-resistant spatula, bringing bottom pieces to the top and pushing top pieces toward the bottom. This ensures even cooking and prevents any pieces from burning while others remain undercooked. Take this opportunity to assess doneness—if the beef appears nearly cooked through and vegetables show good color, reduce the remaining cooking time.
Final Stage
Continue cooking for an additional 4-7 minutes, checking at the 4-minute mark. The beef should reach an internal temperature of at least 145°F for medium-rare, though many prefer fajita meat slightly more cooked, around 160°F for medium-well. Vegetables should show char marks and slight tenderness while retaining some texture—they shouldn’t be mushy or completely soft.
Serving Suggestions
Traditional Presentation
Warm flour or corn tortillas provide the classic base. Flour tortillas are softer and more pliable, making them easier to fold, while corn tortillas offer authentic flavor and work for gluten-free diets. Heating tortillas in the Ninja Crispi for 30-60 seconds after removing the fajita mixture works perfectly—just wrap them in foil first to prevent drying out.
Arrange the hot fajita mixture on a serving platter and bring tortillas to the table separately, allowing diners to build their own. This interactive element adds enjoyment to the meal and lets each person customize their fajitas to preference.
Toppings and Accompaniments
Standard fajita toppings enhance the dish and add textural contrast. Sour cream provides cooling richness, while guacamole or sliced avocado adds healthy fats and creamy texture. Shredded cheese—cheddar, Monterey Jack, or a Mexican blend—melts slightly from the heat of the meat and vegetables.
Fresh salsa, whether pico de gallo or a smoother restaurant-style version, adds brightness and acidity. Chopped fresh cilantro contributes herbaceous notes that complement the spices. Lime wedges are essential for squeezing over assembled fajitas, adding a final burst of citrus. Pickled jalapeños provide heat and tang for those who want extra kick.
Low-Carb Alternative
For those avoiding tortillas, serve the fajita mixture over cauliflower rice, in lettuce wraps, or alongside a simple salad. The flavors stand strong enough without a traditional wrapper. This approach significantly reduces carbohydrate content while maintaining all the satisfying flavors of traditional fajitas.
Customization Options
Protein Variations
While beef is traditional, the same method works excellently with chicken breast or thighs. Chicken cooks slightly faster, usually requiring only 10-12 minutes total. Shrimp creates impressive fajitas and cooks even more quickly—just 6-8 minutes total. For vegetarian versions, portobello mushrooms sliced into strips provide meaty texture and absorb seasonings beautifully.
Vegetable Additions
Beyond standard peppers and onions, consider adding sliced zucchini for extra vegetables without significantly changing cooking time. Cherry tomatoes, added during the final few minutes of cooking, burst and create a fresh sauce. Poblano peppers deliver authentic Mexican flavor with mild heat. Corn kernels, either fresh or frozen, add sweetness and textural variety.
Heat Adjustments
Control spice levels by adjusting chili powder quantities or adding fresh jalapeños for more heat. For milder versions, use sweet paprika instead of hot varieties and reduce or eliminate cayenne pepper if present in the seasoning blend. Adding chipotle powder instead of regular chili powder creates smoky heat that many find more complex and interesting.
Troubleshooting Common Issues
Tough Beef
If beef turns out chewy, the likely culprit is cutting with the grain rather than against it. Also ensure strips aren’t too thick—thinner pieces cook more quickly and remain tender. Overcooking also causes toughness, so monitor temperature carefully and remove the basket as soon as the beef reaches the desired doneness.
Soggy Vegetables
Excess moisture prevents proper browning. Make sure vegetables are thoroughly dried before seasoning, and don’t overcrowd the basket. Adding vegetables that have been sitting in marinade with the beef can introduce too much liquid—if marinating beef, keep vegetables separate and add them at cooking time. Cooking in two batches if necessary produces better results than overloading.
Uneven Cooking
If some pieces are done while others remain undercooked, the issue is likely inconsistent sizing. Take extra time during prep to ensure uniform cuts. Also verify that ingredients are spread relatively evenly in the basket—clumps of beef or vegetables will cook at different rates than pieces with space around them.
Lack of Char
If fajitas emerge cooked but without the desired caramelization and char, the temperature may not be high enough, or there may be too much moisture. Ensure the Crispi is fully preheated before adding ingredients, and verify that the beef is patted dry. A light coating of oil is necessary for browning, but excess oil can actually inhibit char formation.
Make-Ahead Tips
Fajitas lend themselves well to meal prep strategies that save time on busy evenings. Planning ahead transforms this 30-minute meal into a 15-minute assembly and cooking process.
Seasoning mix can be blended in bulk—triple or quadruple the recipe and store in an airtight container for multiple uses. This eliminates the need to measure individual spices each time.
Marinated beef can be prepared up to 24 hours ahead, storing in the refrigerator in a sealed container or zip-top bag until ready to cook. The extended marination time actually improves flavor penetration.
Pre-cut vegetables stay fresh for up to two days when stored properly. Keep sliced peppers and onions in sealed containers in the refrigerator. Some moisture loss occurs, but it’s minimal and doesn’t significantly impact final results.
Leftover cooked fajitas reheat exceptionally well in the Crispi at 350°F for 3-4 minutes, recovering most of their original texture. This makes them ideal for meal prep—cook a double batch and enjoy throughout the week
Conclusion
Ninja Crispi beef fajitas represent the intersection of convenience and quality cooking. This appliance transforms a traditionally involved dish into a streamlined process without sacrificing the flavors and textures that make fajitas satisfying. The combination of rapid cooking, minimal cleanup, and consistent results makes this recipe a worthy addition to any regular meal rotation.
Whether cooking for a family dinner or meal prepping for the week ahead, mastering this technique opens doors to countless variations and customizations. The Ninja Crispi’s versatility extends beyond fajitas, but this recipe showcases exactly why this appliance has become a kitchen staple for those seeking both speed and quality in their home cooking.
Frequently Asked Questions
Can frozen beef be used directly in the Ninja Crispi for fajitas?
Frozen beef should be thawed before cooking for best results. Frozen meat releases excess moisture during cooking, which prevents proper browning and leads to steaming rather than searing. Thawing overnight in the refrigerator or using the quick-thaw method (sealed in cold water for 30-60 minutes) produces much better texture and flavor.
How much beef and vegetables fit in the Ninja Crispi basket?
Most Ninja Crispi models accommodate 1-1.5 pounds of beef plus 2-3 cups of sliced vegetables comfortably. Overcrowding reduces air circulation and leads to uneven cooking. For larger quantities, cooking in two batches delivers superior results to overloading a single batch.
What’s the difference between cooking fajitas in the Crispi versus on a stovetop?
The Ninja Crispi’s circulating hot air creates more even browning with less oil than stovetop methods. Traditional skillet cooking often requires higher fat content to prevent sticking and can produce uneven results depending on pan hotspots. The Crispi also requires no supervision during cooking, freeing up time for other tasks.
Can aluminum foil be used in the Ninja Crispi for easier cleanup?
Aluminum foil can be used but should not cover the entire basket or block air vents. Using foil reduces air circulation, which may increase cooking time and reduce browning quality. For easier cleanup, using the Crispi’s nonstick basket as designed and washing promptly after cooling generally works best.
How should leftover fajita meat be stored and how long does it last?
Store cooled fajita meat and vegetables in airtight containers in the refrigerator for up to 3-4 days. Keep the meat and vegetables separate from tortillas and fresh toppings to maintain texture. Fajita meat also freezes well for up to 3 months—freeze in portion-sized containers for convenient future meals. Thaw overnight in the refrigerator before reheating.
Last update on 2026-02-18 / Affiliate links / Images from Amazon Product Advertising API
*We may earn a commission for purchases made using our links. Please see our disclosure to learn more.