Ninja CRISPi Microwave Breakfast Casserole

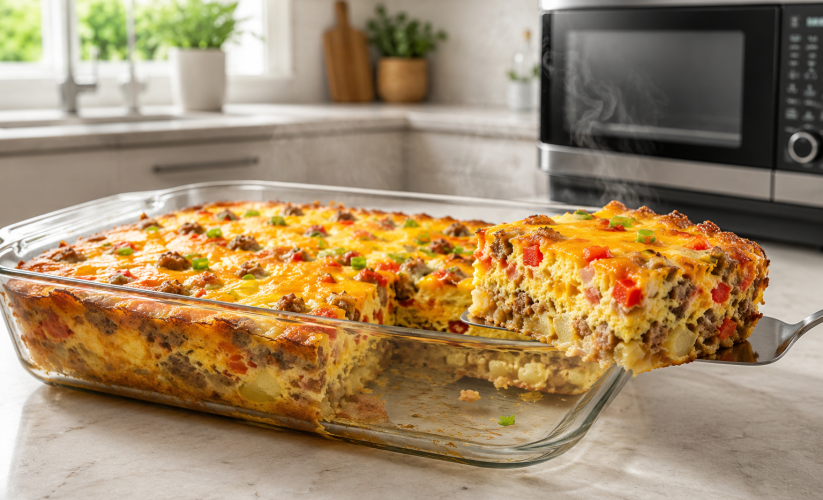
A warm breakfast casserole is one of the easiest ways to feed a family without standing over the stove cooking individual portions of eggs, potatoes, and breakfast meat. This Ninja CRISPi Microwave Breakfast Casserole combines all three in one glass cooking dish, producing a creamy egg center, tender potatoes, melted cheese, and a lightly crisped top.
The Ninja CRISPi Microwave is particularly well suited to this type of recipe because it combines traditional microwave heating with air-fryer-style convection cooking. Its microwave function helps heat the center quickly, while Air Bake or FusionCrisp can finish the casserole with a more appetizing golden surface. The appliance also includes a 5.5-quart glass cooking basket large enough for a family-sized casserole. s recipe includes two cooking options. The standard Air Bake method provides the most even, oven-style texture. The faster combination method starts with reduced-power microwave cooking and finishes with Air Bake, cutting down the total cooking time without leaving the top pale or soggy.
“Casseroles and other dishes containing eggs should be cooked to 160°F.”
U.S. Food and Drug Administration, What You Need to Know About Egg Safety.
Key Takeaways
- Use the Ninja CRISPi Microwave’s glass basket without the crisper plate.
- Cook sausage, bacon, or other raw meat completely before adding it to the eggs.
- Thaw and dry frozen hash browns to prevent a watery casserole.
- Air Bake gives the casserole its most even, traditional baked texture.
- For faster cooking, microwave at reduced power before using Air Bake.
- Check the center with a food thermometer rather than relying only on appearance.
- Let the casserole rest for at least eight minutes before slicing.
No products found.
Why This Ninja CRISPi Breakfast Casserole Works
Breakfast casseroles can be deceptively difficult to cook. The outside may become dry before the center sets, especially when the mixture contains cold eggs, frozen potatoes, vegetables, and cheese.
This recipe avoids that problem in several ways.
First, the potatoes are thawed and patted dry. Removing excess surface moisture helps them absorb the egg mixture instead of releasing water into it.
Second, the meat and vegetables are cooked before assembly. This removes moisture from the vegetables, renders excess fat from the sausage, and ensures that the casserole does not have to cook long enough to safely cook raw meat.
Finally, the casserole rests after cooking. Eggs continue to firm slightly from retained heat, while the melted cheese and liquid inside the casserole settle. Cutting it immediately can make even a properly cooked casserole appear wet.
Recipe at a Glance
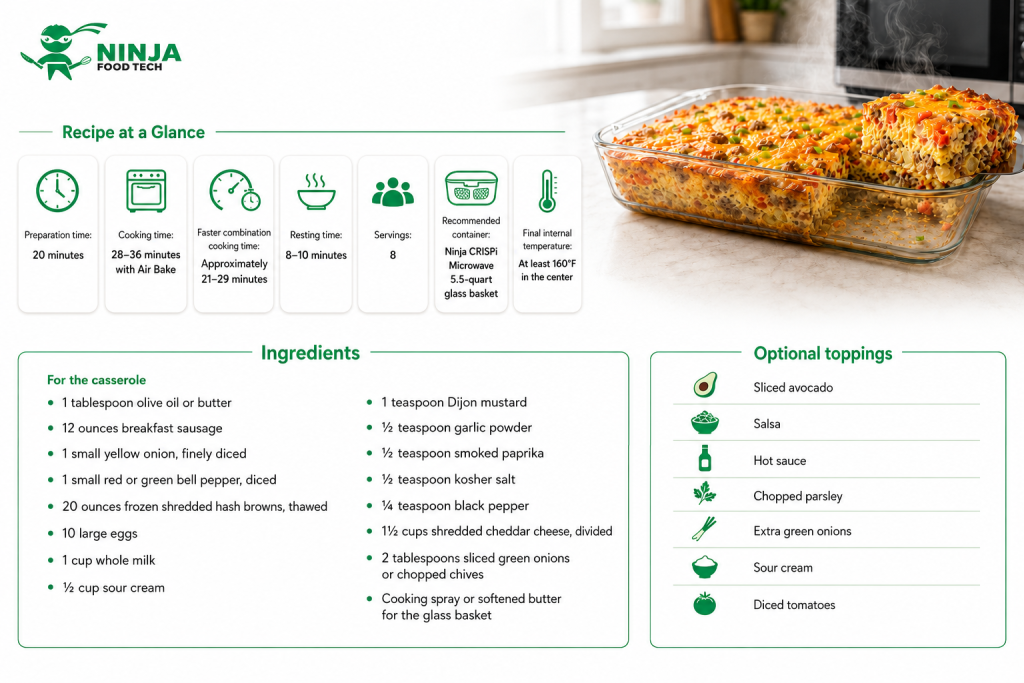
Preparation time: 20 minutes
Cooking time: 28–36 minutes with Air Bake
Faster combination cooking time: Approximately 21–29 minutes
Resting time: 8–10 minutes
Servings: 8
Recommended container: Ninja CRISPi Microwave 5.5-quart glass basket
Final internal temperature: At least 160°F in the center
Ingredients
For the casserole
- 1 tablespoon olive oil or butter
- 12 ounces breakfast sausage
- 1 small yellow onion, finely diced
- 1 small red or green bell pepper, diced
- 20 ounces frozen shredded hash browns, thawed
- 10 large eggs
- 1 cup whole milk
- ½ cup sour cream
- 1 teaspoon Dijon mustard
- ½ teaspoon garlic powder
- ½ teaspoon smoked paprika
- ½ teaspoon kosher salt
- ¼ teaspoon black pepper
- 1½ cups shredded cheddar cheese, divided
- 2 tablespoons sliced green onions or chopped chives
- Cooking spray or softened butter for the glass basket
Optional toppings
- Sliced avocado
- Salsa
- Hot sauce
- Chopped parsley
- Extra green onions
- Sour cream
- Diced tomatoes
Ingredient Notes and Substitutions
Breakfast sausage
Pork breakfast sausage provides a familiar savory flavor, but turkey or chicken sausage can also be used. Remove any casings before cooking and break the meat into small crumbles.
The sausage must be completely cooked before it goes into the casserole. Drain away excessive grease so it does not collect around the eggs.
Cooked bacon, diced ham, leftover chicken, or meatless breakfast crumbles may be substituted in equal amounts.
Hash browns
Shredded hash browns form a soft potato base and help make the casserole filling enough to serve as a complete breakfast.
Frozen potatoes should be fully thawed. Place them between clean kitchen towels or several layers of paper towel and press firmly to remove water. Skipping this step is one of the most common causes of a loose or watery breakfast casserole.
Diced cooked potatoes or refrigerated hash browns may also be used. Avoid adding completely raw potato cubes because they may not become tender before the eggs finish cooking.
Eggs and dairy
Whole milk gives the eggs a soft texture without making the mixture excessively rich. Sour cream adds body and helps prevent the eggs from becoming dry.
Half-and-half can replace the milk for a richer result. For a lighter casserole, use 2% milk and replace the sour cream with plain Greek yogurt.
Avoid using only heavy cream. Too much fat can make the casserole feel greasy and may slow the setting of the center.
Cheese
Cheddar melts well and provides enough flavor to season the mild eggs and potatoes. Monterey Jack, Colby, pepper Jack, Swiss, Gouda, or a Mexican-style cheese blend can be used instead.
Pre-shredded cheese is convenient, but freshly grated cheese usually melts more smoothly because it does not contain the same amount of anti-caking powder.
Equipment You Will Need
- Ninja CRISPi Microwave
- 5.5-quart glass cooking basket
- Large mixing bowl
- Whisk
- Skillet
- Flexible spatula
- Instant-read food thermometer
Do not install the crisper plate under the casserole. The liquid egg mixture needs to remain in the solid glass basket, and the casserole benefits from direct contact with the bottom of the baking dish.
Do not use aluminum foil, metal pans, or metallic utensils during any microwave cooking stage. Ninja’s compatibility guidance distinguishes between microwave and convection functions, so accessories that may be acceptable during an air-frying function should not automatically be considered safe for microwave use. How to Make Ninja CRISPi Microwave Breakfast Casserole
Step 1: Prepare the hash browns
Thaw the frozen hash browns completely. Spread them over a clean kitchen towel, roll up the towel, and press firmly to remove excess moisture.
Season the potatoes with a small pinch of salt and pepper. Set them aside while preparing the remaining ingredients.
Step 2: Cook the sausage
Heat the olive oil in a skillet over medium heat.
Add the breakfast sausage and cook for approximately six to eight minutes, breaking it into small pieces with a spatula. Continue cooking until no pink remains.
Transfer the cooked sausage to a paper-towel-lined plate. Leave approximately one teaspoon of fat in the skillet and discard the rest.
Step 3: Cook the vegetables
Add the diced onion and bell pepper to the skillet.
Cook for four to five minutes, stirring occasionally, until the onion becomes translucent and the pepper begins to soften. Cooking the vegetables beforehand concentrates their flavor and prevents them from releasing excessive water into the egg mixture.
Remove the skillet from the heat.
Step 4: Make the egg mixture
Crack the eggs into a large mixing bowl.
Add the milk, sour cream, Dijon mustard, garlic powder, smoked paprika, salt, and black pepper. Whisk until the yolks and whites are completely combined and no large streaks of sour cream remain.
Stir in one cup of shredded cheese.
Step 5: Assemble the casserole
Lightly grease the bottom and sides of the Ninja glass basket with cooking spray or softened butter.
Spread the dried hash browns evenly across the bottom. Press them down lightly, but do not pack them into a dense layer.
Distribute the sausage, onion, and pepper over the potatoes. Sprinkle the green onions or chives over the filling.
Slowly pour the egg mixture into the basket. Pouring gradually gives the liquid time to move through the meat and potatoes instead of collecting only on top.
Use a spatula to gently press any exposed ingredients into the eggs. Finish with the remaining ½ cup of cheese.
Cooking Option 1: Air Bake for the Best Texture
Place the filled glass basket inside the Ninja CRISPi Microwave.
Select Air Bake and set the temperature to 325°F. If your specific model uses a preset Air Bake temperature, use the standard Air Bake setting and begin checking the casserole earlier.
Cook for 28 to 36 minutes. Start checking after approximately 25 minutes because ingredient temperature, casserole depth, and appliance model can affect the final cooking time.
The edges should look firm, the cheese should be melted, and the center should move only slightly when the basket is gently shaken.
Insert an instant-read thermometer into the thickest part of the center without touching the glass bottom. Continue cooking until the center reaches at least 160°F.
If the eggs are set but the top needs additional color, use Air Broil for one to two minutes. Watch continuously because cheese can darken quickly under concentrated top heat.
Cooking Option 2: Faster Microwave and Air Bake Method
This method uses gentle microwave energy to begin setting the center before convection heat browns the surface.
Place the uncovered glass basket in the appliance. Microwave at approximately 60% power for seven to nine minutes. The edges should begin to set, but the center should remain visibly loose.
Allow the casserole to stand for two minutes. The standing period helps the heat spread more evenly through the egg mixture.
Switch to Air Bake at 325°F and cook for another 12 to 18 minutes. Check the center with a food thermometer and continue cooking until it reaches at least 160°F.
Do not microwave the casserole at full power for an extended period. Aggressive microwave heating can overcook the edges while leaving pockets of loose egg in the center.
Exact controls can vary among models in the MW100 series, so follow the control sequence in the guide supplied with your appliance. The Ninja quick-start documentation supports several MW101 variants. How to Tell When the Casserole Is Done
Appearance alone is not always a reliable indication of doneness. Melted cheese can hide liquid egg, while the outside may look completely set before the middle is ready.
Look for these signs:
- The edges are firm and slightly puffed.
- The center no longer looks shiny or liquid.
- A knife inserted near the center comes out without raw egg.
- The center reaches at least 160°F.
- Only a slight movement is visible when the basket is gently shaken.
The FDA recommends using a thermometer to confirm that egg casseroles reach 160°F. e the correct temperature is reached, remove the basket carefully and place it on a heat-safe surface. Let the casserole rest for eight to ten minutes before cutting.
Tips for the Best Results
Start with room-temperature ingredients when practical
Cold eggs and milk can increase the cooking time. Taking them out of the refrigerator while preparing the sausage and vegetables helps the casserole cook more evenly.
Do not leave eggs or dairy products at room temperature for an extended period.
Keep the filling evenly distributed
Large mounds of potatoes or sausage create cold pockets. Spread every layer from corner to corner before adding the eggs.
Do not overfill the basket
The eggs expand slightly during cooking. Leave visible space between the top of the mixture and the rim of the basket.
Add delicate toppings after cooking
Fresh tomatoes, avocado, salsa, and herbs are best added immediately before serving. Cooking them in the casserole can release water or dull their flavor.
Let it rest before slicing
Resting is essential for clean portions. The casserole will be easier to lift from the basket and less likely to release liquid onto the plate.
Breakfast Casserole Variations
Bacon and cheddar
Replace the sausage with eight slices of cooked, crumbled bacon. Add an extra ¼ cup of cheddar for a richer casserole.
Ham and Swiss
Use 1½ cups of diced cooked ham and replace the cheddar with Swiss cheese. A small pinch of dried thyme complements this version.
Southwest casserole
Use pepper Jack cheese and add ½ cup of drained canned green chiles. Serve with salsa, avocado, cilantro, and hot sauce.
Vegetarian casserole
Leave out the sausage and add cooked mushrooms, spinach, zucchini, or broccoli. Cook vegetables first and remove as much moisture as possible.
Higher-protein casserole
Replace the sour cream with blended cottage cheese and use cooked turkey sausage. Blend the cottage cheese with the eggs and milk before adding the seasonings.
Lower-carbohydrate casserole
Omit the hash browns and increase the cooked vegetables. Broccoli, mushrooms, spinach, and peppers work particularly well.
Troubleshooting Common Problems
Why is my breakfast casserole watery?
The most likely causes are wet hash browns, uncooked vegetables, excessively moist meat, or cutting the casserole too early.
Thaw and dry the potatoes thoroughly, sauté the vegetables, drain the sausage, and give the finished casserole a full resting period.
Why are the edges rubbery?
Rubbery edges are usually caused by cooking too long at high power. Use reduced microwave power or select the Air Bake method.
Stop cooking as soon as the center reaches the safe temperature. Continuing well beyond that point removes moisture from the eggs.
Why is the top brown but the center is loose?
The casserole may be too deep, the ingredients may have been very cold, or the Air Bake temperature may be too high.
Return it to Air Bake at a lower temperature, if adjustable, and check it every three to five minutes. Do not continue using Air Broil because it will darken the top without adequately cooking the middle.
Why did the casserole stick?
The egg mixture can bond firmly to ungreased glass. Coat the basket thoroughly, including the corners and lower sides, before adding the ingredients.
Allowing the casserole to rest also makes it easier to release.
Make-Ahead Instructions
The sausage and vegetables can be cooked up to two days in advance and refrigerated in separate airtight containers.
The complete casserole may also be assembled the night before. Cover the glass basket and refrigerate it promptly. Before cooking, remove the storage lid and let the basket stand at room temperature for approximately 15 to 20 minutes while the appliance and work area are prepared.
A refrigerated casserole will usually require several additional minutes of cooking. Always use its internal temperature rather than a fixed cooking time to determine doneness.
Storage and Reheating
Cool leftovers and refrigerate them within two hours. Store individual portions in shallow, airtight containers so they cool efficiently.
The FDA recommends using refrigerated leftover egg dishes within three to four days. Reheated egg dishes should reach 165°F before serving. reheat one portion, place it in a microwave-safe dish and cover it loosely. Microwave in short intervals until the center is hot. For a firmer surface, finish with Recrisp or Air Bake for two to four minutes.
To freeze the casserole, cool it completely and cut it into individual portions. Wrap each serving securely and place the portions in a freezer-safe container. For the best texture, use them within approximately two months.
Thaw frozen portions overnight in the refrigerator before reheating.
What to Serve with Breakfast Casserole
Because this casserole already contains eggs, meat, potatoes, vegetables, and cheese, it needs only a simple accompaniment.
Serve it with:
- Fresh berries or sliced melon
- Mixed fruit salad
- Toast or English muffins
- Sliced avocado
- Lightly dressed greens
- Salsa or pico de gallo
- Coffee, tea, or fresh juice
For brunch, add cinnamon rolls, muffins, pancakes, or yogurt parfaits.
Frequently Asked Questions
1. Do I use the crisper plate for a Ninja CRISPi breakfast casserole?
No. Make the casserole directly in the solid glass basket without the crisper plate. Liquid egg could flow through or underneath the plate, and the flat glass bottom provides the stable baking surface needed for a casserole.
The crisper plate is more useful when air needs to circulate beneath relatively solid foods, such as fries, wings, or breaded items.
2. Can I assemble the casserole the night before?
Yes. Cook and cool the sausage and vegetables, assemble the casserole in the glass basket, cover it, and refrigerate it overnight.
Remove the storage lid before cooking. Because the ingredients and basket will be cold, the casserole may need additional cooking time. Check the center with a food thermometer and make sure it reaches at least 160°F.
3. Can frozen hash browns go directly into the casserole?
Thawing is strongly recommended. Frozen hash browns release water as they heat, which can dilute the eggs and create an uneven texture.
Thaw the potatoes in the refrigerator overnight or use the microwave’s defrost function. Press them between towels before assembling the casserole.
4. Can I make this breakfast casserole without meat?
Yes. Replace the sausage with approximately two cups of cooked vegetables. Mushrooms, spinach, broccoli, onions, peppers, zucchini, and asparagus are all suitable.
Cook the vegetables before adding them, especially mushrooms, spinach, and zucchini, because they can release a considerable amount of water.
5. How do I reheat breakfast casserole in the Ninja CRISPi Microwave?
For the fastest result, microwave an individual serving in short intervals until the center is hot, then use Recrisp or Air Bake for two to four minutes to restore the surface texture.
For multiple portions, arrange them in the glass basket with a little space between each piece and use Air Bake until heated through. Reheated egg dishes should reach 165°F before serving. A Convenient Breakfast for Busy Mornings
This Ninja CRISPi Microwave Breakfast Casserole turns familiar breakfast ingredients into one practical, family-sized meal. The glass basket makes assembly straightforward, Air Bake provides an oven-style texture, and the optional microwave-first method helps reduce cooking time on busy mornings.
The recipe is also easy to customize. Change the meat, vegetables, cheese, or seasonings without changing the basic egg mixture. Prepare it for weekend brunch, assemble it before a holiday morning, or portion the leftovers for quick breakfasts throughout the week.
The most important steps are simple: remove moisture from the potatoes and vegetables, precook the meat, avoid overly aggressive microwave heating, and confirm that the center reaches a safe temperature. Follow those principles, and the casserole should emerge tender, flavorful, evenly cooked, and ready to serve from the same glass basket in which it was prepared.
Last update on 2026-09-20 / Affiliate links / Images from Amazon Product Advertising API
*We may earn a commission for purchases made using our links. Please see our disclosure to learn more.