Easy Ninja Appliance Keto Diet Recipes
Juggling a keto diet with a hectic schedule can feel overwhelming. You want to stick to your low-carb goals, but finding time to cook nutritious meals after a long day seems impossible. Here comes the easy Ninja appliance keto diet recipes! Many busy professionals struggle to maintain their ketogenic lifestyle while balancing work, family, and other commitments.
Did you know that using Ninja appliances can significantly cut down your cooking time for keto-friendly meals? These versatile kitchen tools offer quick and easy solutions for preparing delicious low-carb dishes.
Don’t have time to read? 🎧 Listen to our podcast instead! Click play below to enjoy the full episode on the go, and catch all the tips and insights in just a few minutes.
This article will introduce you to simple and easy Ninja appliance keto diet recipes perfect for busy weeknights. You’ll discover how to whip up tasty, high-fat, low-carb meals in no time. Get ready to revolutionize your weeknight dinner routine!
Key Takeaways
- Ninja appliances like the Foodi Pressure Cooker make keto cooking quick and easy, with features like air frying and pressure cooking that are perfect for low-carb meals.
- Popular keto recipes for Ninja appliances include cauliflower lasagna, Philly cheesesteak stuffed peppers, and air fryer buffalo wings – all ready in under 30 minutes.
- Using low-carb alternatives like cauliflower rice and zucchini noodles in Ninja appliance recipes helps keep meals keto-friendly while still tasting delicious.
- The Ninja Foodi Pressure Cooker comes with a cookbook with 75 keto recipes, while other Ninja appliance cookbooks offer 500+ low-carb meal ideas.
- Ninja appliance’s non-stick surfaces and dishwasher-safe parts make cleanup easy, saving time on busy weeknights when following a keto diet.

Benefits of Using Ninja Appliances for Keto Cooking
Easy Ninja Appliance Keto Diet Recipes revolutionize keto cooking, offering versatility and convenience for busy home cooks. These multi-functional devices, like the Ninja Foodi Pressure Cooker, simplify meal preparation with features tailored to low-carb diets.
You can effortlessly create a wide range of keto-friendly dishes, from cauliflower lasagna to air-fried buffalo wings, all in one compact unit. The time-saving capabilities of Ninja appliances are particularly valuable for those juggling hectic schedules while maintaining a ketogenic lifestyle.
Ninja appliances are the secret weapon for quick and delicious keto meals.
These innovative kitchen tools excel at preparing high-fat, low-carb meals essential to the keto diet. The Ninja Foodi’s air frying function allows you to achieve crispy textures without excessive oil, perfect for dishes like grain-free breaded shrimp or crispy drumsticks.
The pressure cooking feature tenderizes tough cuts of meat rapidly, ideal for creating flavorful pot roasts or tender chicken for zoodle soup. With 500 to 800 low-carb recipes available in Ninja Foodi keto cookbook, you’ll never run out of inspiration for your next meal.
Easy Keto Recipes for Busy Weeknights
Easy Ninja appliance keto diet recipes offer delicious, low-carb meals that fit seamlessly into hectic schedules. These recipes maximize flavor while minimizing prep time, making it simple to stick to your ketogenic diet even on the busiest days.
KETO CAULIFLOWER LASAGNA
Ingredients:
- 1 large head of cauliflower
- 1 lb ground beef
- 1 small onion, finely chopped
- 2 cloves garlic, minced
- 1 cup marinara sauce (sugar-free)
- 1 cup ricotta cheese
- 2 cups shredded mozzarella cheese
- 1/2 cup grated Parmesan cheese
- 1 large egg
- 1 tsp dried oregano
- 1 tsp dried basil
- Salt and pepper to taste
- Fresh basil for garnish (optional)
Procedure:
1.Slice: Cut the cauliflower into thin slices, resembling lasagna sheets. Use a mandoline slicer for even slices.
2.Steam: Place the cauliflower slices in the Ninja Air Fryer. Set the temperature to 375°F and cook for 10 minutes until tender. Remove and set aside.
3.Sauté: Set your Ninja to the sauté function. Add the ground beef, onion, and garlic. Cook until the beef is browned and the onions are translucent.
4.Add Marinara: Pour in the marinara sauce, dried oregano, dried basil, salt, and pepper. Stir well and let it simmer for 5-7 minutes. Turn off the Ninja and set the meat sauce aside.
5.Mix: In a bowl, combine ricotta cheese, half of the mozzarella cheese, Parmesan cheese, and the egg. Mix until well blended.
6.Layer: In your Ninja Air Fryer, start with a layer of cauliflower slices at the bottom. Add a layer of the meat sauce, followed by a layer of the cheese mixture. Repeat the layers until all the ingredients are used, finishing with a layer of mozzarella cheese on top.
7.Bake: Set the Ninja Air Fryer to 375°F. Place the assembled lasagna inside and cook for 20-25 minutes until the cheese on top is golden and bubbly.
8.Garnish and Enjoy: Let the lasagna cool for a few minutes before slicing. Garnish with fresh basil if desired. Serve and enjoy your delicious Keto Cauliflower Lasagna!
Tips:
- For a Crispier Top: Use the broil function on your Ninja for the last 2-3 minutes to get a crispier cheese topping.
- Storage: Leftovers can be stored in an airtight container in the refrigerator for up to 3 days.
Enjoy your healthy and satisfying Keto Cauliflower Lasagna made effortlessly with your Ninja Air Fryer!
Keto Pressure Cooker Pot Roast
Ingredients:
- 3 lbs chuck roast
- 2 tablespoons olive oil
- 1 medium onion, chopped
- 3 cloves garlic, minced
- 1 cup beef broth
- 1 tablespoon tomato paste
- 1 tablespoon Worcestershire sauce (ensure it’s keto-friendly)
- 1 teaspoon dried thyme
- 1 teaspoon dried rosemary
- Salt and pepper to taste
- 2 cups radishes, halved (as a keto-friendly potato substitute)
- 2 cups celery, chopped
- 2 cups green beans, trimmed
Instructions:
1. Prep the Ingredients: Chop the onion and celery. Mince the garlic. Halve the radishes. Trim the green beans.
2. Sear the Meat: Set your Ninja Foodi to the “Sear/Sauté” function. Add 2 tablespoons of olive oil and let it heat up. Season the chuck roast with salt and pepper on all sides. Sear the roast in the Ninja Foodi until browned on all sides. This should take about 4-5 minutes per side. Remove and set aside.
3. Sauté the Vegetables: In the same pot, add the chopped onion and minced garlic. Sauté until the onion becomes translucent, about 3-4 minutes.
4. Deglaze the Pot: Add the beef broth, tomato paste, Worcestershire sauce, dried thyme, and dried rosemary to the pot. Stir well to combine and scrape up any browned bits from the bottom of the pot.
5. Pressure Cook the Roast: Return the seared roast to the pot. Secure the pressure cooker lid and set the Ninja Foodi to “Pressure Cook” on high for 60 minutes.
6. Natural Release: After the cooking time is complete, allow the pressure to release naturally for 10 minutes, then quick release any remaining pressure.
7. Add the Vegetables: Carefully remove the lid and add the halved radishes, chopped celery, and trimmed green beans to the pot. Stir to combine.
8. Pressure Cook the Vegetables: Secure the lid again and set the Ninja Foodi to “Pressure Cook” on high for an additional 5 minutes.
9. Final Release and Serve: Once the cooking is complete, quick release the pressure. Open the lid, give everything a good stir, and check the seasoning. Adjust salt and pepper if needed. Serve hot and enjoy your keto-friendly pot roast!
Tips:
Vegetable Substitutes: If you don’t have radishes, you can use other low-carb vegetables like turnips or cauliflower. its juiciness. Next, let’s explore another quick and easy keto-friendly recipe: Shrimp & Cauliflower Rice Risotto.
Searing: Searing the meat adds a rich, deep flavor. Make sure to get a good brown crust on all sides.
Enjoy your healthy and satisfying Keto Pressure Cooker Pot Roast made effortlessly with your Ninja Pressure Cooker!
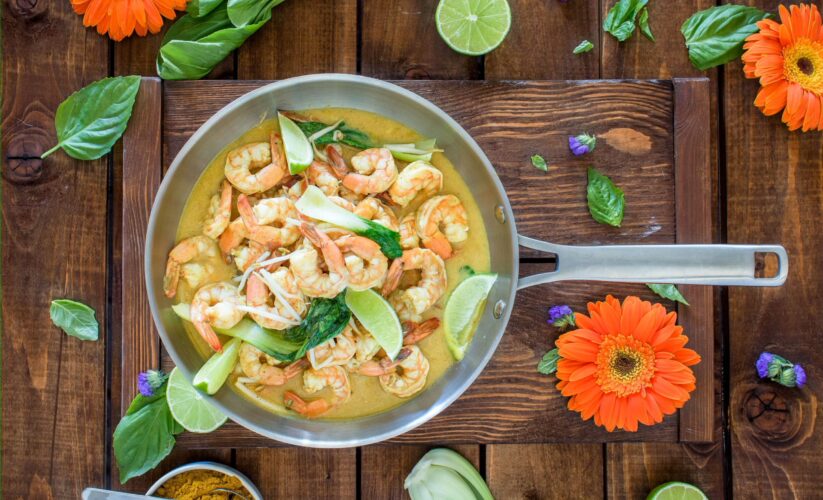
Keto Shrimp & Cauliflower Rice Risotto Recipe
Ingredients:
- 1 lb (450g) raw shrimp, peeled and deveined
- 1 large head of cauliflower, grated into rice-sized pieces (or 4 cups store-bought cauliflower rice)
- 2 tbsp olive oil
- 1 small onion, finely chopped
- 2 cloves garlic, minced
- 1 cup chicken or vegetable broth
- 1/2 cup heavy cream
- 1/4 cup grated Parmesan cheese
- 1 tbsp lemon juice
- 1 tsp dried thyme
- 1/2 tsp paprika
- Salt and pepper to taste
- Fresh parsley, chopped (for garnish)
Instructions:
1. Prep the Ingredients: If you’re using a fresh cauliflower head, grate it into rice-sized pieces using a food processor or box grater. Peel and devein the shrimp if not pre-prepared. Finely chop the onion and mince the garlic.
2. Sauté the Aromatics: Turn on the Ninja Foodi and select the ‘Sauté’ function. Add the olive oil and let it heat up for about 1 minute. Add the chopped onion and minced garlic to the pot. Sauté for about 3-4 minutes until the onion becomes translucent and the garlic is fragrant.
3. Cook the Shrimp: Add the shrimp to the pot and cook for about 2-3 minutes, or until they turn pink and opaque. Remove the shrimp from the pot and set aside.
4. Prepare the Cauliflower Rice: With the Ninja Foodi still on the ‘Sauté’ function, add the grated cauliflower rice to the pot. Cook for about 5 minutes, stirring occasionally, until the cauliflower begins to soften.
5. Build the Risotto Base: Add the chicken or vegetable broth, heavy cream, dried thyme, paprika, salt, and pepper to the cauliflower rice. Stir well to combine. Close the lid of the Ninja Foodi and set it to the ‘Pressure Cook’ function on high for 3 minutes.
6. Pressure Release and Final Touches: After the cooking cycle is complete, perform a quick pressure release by turning the valve to venting. Open the lid carefully and stir in the grated Parmesan cheese and lemon juice.
7. Combine and Serve: Add the cooked shrimp back into the pot, stirring gently to combine all the ingredients. Garnish with fresh parsley and serve immediately.
Tips:
- Customize Your Flavors: Feel free to add your favorite herbs and spices to enhance the flavors. Fresh basil, dill, or cilantro can make great additions.
- Perfect Cauliflower Rice: To avoid soggy cauliflower rice, make sure not to overcook it during the sauté step.
- Shrimp Substitute: If you prefer, you can use cooked chicken or even mushrooms as a substitute for shrimp.
Enjoy your Keto Shrimp & Cauliflower Rice Risotto, perfectly cooked in your Ninja Foodi!
Keto Philly Cheesesteak Stuffed Peppers Recipe
Ingredients:
- 4 large bell peppers (red, green, or yellow)
- 1 lb thinly sliced beef (ribeye or flank steak works well)
- 1 medium onion, thinly sliced
- 8 oz mushrooms, sliced (optional)
- 1 tbsp olive oil
- 1 tsp garlic powder
- 1 tsp onion powder
- Salt and pepper to taste
- 8 slices provolone cheese or 2 cups shredded mozzarella/cheddar cheese
- Fresh parsley for garnish (optional)
Procedure:
1. Prepare the Bell Peppers: Cut the tops off and remove seeds and membranes. Set aside.
2. Sauté the Beef and Vegetables: Sauté beef in the Ninja Foodi with olive oil for 3-4 minutes. Remove and set aside. Sauté onions (and mushrooms) until soft. Return beef, season, and mix. Turn off sauté function.
3. Stuff the Peppers: Place peppers in a dish or air fryer basket. Fill with beef mixture, packing tightly.
4. Top with Cheese: Cover each pepper with a slice of provolone or sprinkle shredded cheese on top.
5. Cook the Stuffed Peppers: Preheat air fryer to 350°F. Cook stuffed peppers for 15-20 minutes until peppers are tender and cheese is melted.
6. Serve: Let cool slightly before serving. Garnish with parsley if desired.
Tips:
- Customize Your Filling: Adjust ingredients to taste.
- Meal Prep: Prep filling ahead for quick assembly.
- Leftovers: Store in fridge for up to 3 days. Reheat in air fryer at 350°F for 5-7 minutes.
Enjoy your keto-friendly Philly Cheesesteak Stuffed Peppers, perfectly cooked using your Ninja Air Fryer!
Keto Baked Crack Chicken
Ingredients:
- 4 boneless, skinless chicken breasts
- 8 oz cream cheese, softened
- 1 packet (1 oz) ranch seasoning mix
- 1 cup shredded cheddar cheese
- 6 slices of bacon, cooked and crumbled
- 1/2 cup green onions, chopped (optional)
- Salt and pepper to taste
Instructions:
1. Preheat: Preheat your Ninja Air Fryer to 350°F (175°C) for about 5 minutes.
2. Season: Season the chicken breasts with salt and pepper.
3. Mix: In a bowl, combine cream cheese, ranch seasoning, and cheddar cheese.
4. Assemble: Place chicken on aluminum foil, spread the cheese mixture on top, and sprinkle with bacon and optional green onions.
5. Wrap: Wrap the foil around the chicken, creating a packet.
6. Cook: Place the packet in the air fryer and cook at 350°F (175°C) for 20-25 minutes.
7. Crisp: Open the foil, increase the temperature to 400°F (200°C), and cook for 5 more minutes.
8. Serve: Let it rest, then serve with roasted vegetables or cauliflower rice. Garnish with green onions if desired.
Tips:
- Advance Preparation: Prepare the cream cheese mixture in advance and store it in the refrigerator for a quicker prep time on busy days.
- Extra Flavor: For an extra kick, add some hot sauce or red pepper flakes to the cream cheese mixture.
Enjoy your delicious, keto-friendly Baked Crack Chicken!
Keto Air Fryer Buffalo Wings
Ingredients:
- 2 lbs chicken wings, split into drumettes and flats
- 1 tsp baking powder (optional, for extra crispiness)
- 1 tsp garlic powder
- 1 tsp onion powder
- 1 tsp smoked paprika
- 1/2 tsp salt
- 1/2 tsp black pepper
- 1/4 cup unsalted butter
- 1/4 cup hot sauce (such as Frank’s RedHot)
- 1 tbsp apple cider vinegar (optional)
- Fresh parsley, chopped (for garnish)
Procedure:
1. Preheat the Air Fryer: Preheat your Ninja Air Fryer to 400°F (200°C) for about 5 minutes.
2. Prepare and Season the Wings: Pat the chicken wings dry with paper towels to remove excess moisture. In a large bowl, toss the wings with baking powder (if using), garlic powder, onion powder, smoked paprika, salt, and black pepper until evenly coated.
3. Arrange the Wings: Place the seasoned wings in a single layer in the air fryer basket. Do not overcrowd the basket; cook in batches if necessary.
4. Air Fry the Wings: Cook the wings in the preheated air fryer at 400°F (200°C) for 20-25 minutes, flipping them halfway through the cooking time to ensure even crispiness.
5. Prepare the Buffalo Sauce: While the wings are cooking, melt the butter in a small saucepan over low heat. Once melted, remove from heat and whisk in the hot sauce and apple cider vinegar until well combined.
6. Toss the Wings in Sauce: Once the wings are crispy and cooked through, transfer them to a large bowl. Pour the buffalo sauce over the wings and toss until they are evenly coated.
7. Serve: Transfer the buffalo wings to a serving platter and garnish with chopped fresh parsley if desired. Serve immediately with celery sticks and your favorite keto-friendly dipping sauce, such as ranch or blue cheese.
Tips:
- Extra Crispiness: For extra crispy wings, you can cook them for an additional 5 minutes.
- Dry Wings: Ensure the wings are dry before seasoning to achieve maximum crispiness.
- Adjust Spice Level: Adjust the amount of hot sauce to your preferred spice level.
Enjoy your Keto Air Fryer Buffalo Wings, a perfect blend of crispy, spicy, and juicy goodness!
Creative Keto Dishes Using Ninja Appliances
Discover innovative keto-friendly dishes using your Ninja appliances with easy Ninja appliance keto diet recipes, transforming simple ingredients into gourmet meals. Read on to explore exciting recipes that will elevate your weeknight dinners while keeping you on track with your low-carb lifestyle.
Seared Scallops
Seared scallops are a delicious keto-friendly dish you can easily prepare using your Ninja appliance. These succulent seafood morsels offer the perfect balance of protein and healthy fats, making them an excellent choice for your low-carb lifestyle.
- NINJA FOODI SMART XL PRESSURE COOKER STEAM FRYER: Extra-large, family-sized capacity with the ability to pressure cook, air fry, and SteamCrisp – all under one SmartLid.
- FOODI SMART THERMOMETER: Enables you to achieve even more accurate results at the touch of a button. No more guesswork.
- SMART COOK SYSTEM: With 4 smart proteins settings and 9 customizable doneness levels, achieve the perfect doneness from rare to well done. 3 auto-steam release controls allow you to select your desired pressure release setting.
| Pros | Cons |
|---|---|
| Versatile Cooking Options: This appliance offers 14 cooking functions, such as pressure cook, air fry, bake, broil, and more, catering to diverse recipes and preferences. Smart Technology: The SmartLid, Smart Thermometer, and Smart Cook System streamline cooking, ensuring precise control and consistent, delicious meals. Faster Cooking Times and Healthier Results: Enjoy 70% faster cooking and 75% less fat, providing a healthier and faster cooking option for busy homes. | Large Footprint: The appliance’s size may be bulky for smaller kitchens or limited countertop space, requiring adequate storage space when not in use. Learning Curve: New user, may face a learning curve due to the appliance’s advanced features, requiring experimentation to master. Price: The Ninja Foodi Smart XL, despite its rich features, commands a higher price than standard pressure cookers or air fryers, potentially exceeding some budgets. |
With your Ninja’s precision temperature control, you’ll achieve that coveted golden-brown crust while maintaining a tender, juicy center.
To create this mouthwatering dish, start by patting your scallops dry and seasoning them with salt and pepper. Heat your Ninja appliance to high and add a tablespoon of butter or oil.
Place the scallops in the pan, allowing them to sear for about 2-3 minutes on each side. The result? A restaurant-quality meal in the comfort of your own home, ready in under 10 minutes.
Pair your seared scallops with a side of cauliflower puree or zucchini noodles for a complete keto-friendly dinner that’s both quick and impressive.
Grilled Chicken with Avocado Salsa
Moving on from seared scallops to another delicious keto-friendly option, grilled chicken with avocado salsa offers the perfect balance of protein and healthy fats. This dish showcases the versatility of Ninja appliances, allowing you to grill the chicken to perfection while maintaining its juiciness.
- 4-in-1 Functionality: Combines a Woodfire Grill, BBQ Smoker, Outdoor Air Fryer, and Oven in one compact, electric unit. Infuse every dish with 100% real woodfire flavor using authentic wood pellets.
- XL Capacity for Entertaining: Cook for a crowd with 180 sq. in. of grill space with 30% more than the original Ninja outdoor grill. Perfectly fits 2 full racks of ribs, 10 burgers, 4 lbs. of wings, 2 whole chickens, or a 10-lb brisket.
- Smart Built-In Thermometer: Take the guesswork out of grilling with a precision temperature probe that monitors doneness in real time and alerts you when your food is perfectly cooked.
| Pros | Cons |
|---|---|
| Versatile Cooking Options: The 4-in-1 functionality allows you to grill, smoke, air fry, and bake, making it a highly versatile addition to any outdoor cooking setup. Large Cooking Capacity: With 180 sq inches of cooking space, it can handle large quantities of food. Convenient Built-In Thermometer: The built-in thermometer ensures your food is cooked to perfection without constant monitoring. | Electric Powered: Requires access to an electrical outlet, which may limit its use in certain outdoor settings. Pellet Dependency: The BBQ smoker function requires wood pellets, which means you need to ensure you have a steady supply. Size and Weight: Despite being portable, its size and weight may make it less convenient to transport compared to smaller. |
For busy weeknights, this recipe proves ideal as it can be prepared quickly using your Ninja grill or air fryer. The chicken breast, seasoned with a blend of keto-friendly spices, cooks in minutes while you whip up a fresh avocado salsa.
This combination not only satisfies your taste buds but also aligns with your low-carb lifestyle goals. The avocado salsa adds a creamy texture and burst of flavor to the grilled chicken, elevating a simple protein into a restaurant-quality meal.
With minimal prep time and easy cleanup, this dish exemplifies how easy Ninja appliance keto diet Recipes can streamline your keto cooking process, making healthy eating accessible even on hectic evenings.
Cauliflower Pizza
Cauliflower pizza offers a delicious, low-carb alternative to traditional pizza crust. Using your Ninja appliance, you can quickly prepare this keto-friendly dish that satisfies your pizza cravings without derailing your diet.
- 14-in-1 VERSATILITY: Combi Meals, Combi Crisp, Combi Bake, Rice/Pasta, Sear/Sauté, Steam, Bake, Toast, Pizza, Slow Cook, Proof, Sous Vide, Air Fry, Broil.
- COMPLETE MEALS THAT COOK IN 15 MINS: Cook your proteins, veggies, and pasta or grains all at the same time and make a meal 50% faster than in a wall oven.
- ONE STOP SHOP IN YOUR KITCHEN: With its all-in-one functionality and included accessories, the Ninja Combi is the only appliance you will ever need—no more cluttered countertops and endless piles of dishes to clean afterward.
| Pros | Cons |
|---|---|
| Versatile Cooking Functions: With 14 cooking modes ranging from Air Fry to Sous Vide, this multicooker offers endless culinary possibilities. Time-Efficient Cooking: Enjoy complete meals cooked 50% faster than traditional methods, thanks to its innovative design that allows simultaneous cooking. Easy Cleanup: The Combi Cooker Pan serves as a serving dish, and all accessories are dishwasher safe. | Learning Curve: Given its multitude of functions, mastering all cooking modes may require some time and experimentation. Large Footprint: While ideal for large families or gatherings, its size may be cumbersome for smaller kitchens. Refurbished Status: While certified refurbished ensures quality, some users may prefer brand new appliances. |
The versatile Ninja Foodi Pressure Cooker allows you to create a crispy crust by first steaming the cauliflower and then air frying it to perfection. Top your cauliflower base with keto-approved ingredients like sugar-free tomato sauce, mozzarella cheese, and your favorite low-carb vegetables or meats.
You’ll love how easy it is to customize this healthy pizza option. The Ninja Foodi’s multiple cooking functions enable you to experiment with different textures and flavors, ensuring your cauliflower pizza turns out just right every time.
This quick and simple meal is perfect for busy weeknights when you need a satisfying dinner without spending hours in the kitchen.
Salmon Steak with Lemon-Garlic Butter
You’ll love this quick and easy Salmon Steak with Lemon-Garlic Butter recipe, perfect for your keto diet and busy weeknights. Using your Ninja appliance, you can create a restaurant-quality dish in minutes.
- MAX CRISP TECHNOLOGY: Delivers up to 450°F of superheated air for faster, hotter, and extra-crispy results using little to no oil—perfect for fries, wings, and more. Achieve that golden crunch with rapid air circulation.
- Guilt-Free, Healthy Fried Foods: Enjoy the indulgence of fried food with up to 75% less fat compared to traditional deep frying. Tested against hand-cut, deep-fried French fries for proven healthier results.
- XL Capacity Air Fryer: The 6.5-quart nonstick basket and crisper plate hold up to 5 lbs. of French fries or 9 lbs. of chicken wings ideal for family meals, game day, and meal prepping.
| Pros | Cons |
|---|---|
| Healthier Cooking: With Max Crisp Technology, enjoy the crispy texture of fried foods with significantly less oil, promoting healthier eating habits. Versatile Cooking Options: This air fryer offers 6-in-1 functionality, letting you air fry, roast, bake, reheat, and dehydrate, catering to various cooking needs. Easy to Clean and Space-Saving: The dishwasher-safe ceramic basket and crisper plate make cleanup easy, and its compact design saves space in small kitchens. | Price: The Ninja AF181 Air Fryer Pro XL’s higher price compared to basic models may be a concern for budget-conscious buyers. Learning Curve: While versatile, mastering the different cooking functions may require some experimentation and adjustment, especially for those new to air frying technology. Size Consideration: The XL capacity is ideal for big batches but might be too large for small kitchens or households, affecting its suitability for some users. |
The air fryer function cooks the salmon to perfection, leaving it moist on the inside with a crispy exterior.
The lemon-garlic butter adds a burst of flavor that complements the rich, fatty salmon, making it an ideal high-fat, low-carb meal. This dish is not only delicious but also packed with omega-3 fatty acids and protein, supporting your ketogenic lifestyle.
You can pair it with a side of air-fried asparagus or zucchini noodles for a complete keto-friendly dinner.
For best results, use fresh salmon steaks and high-quality butter. The Ninja appliance’s versatility allows you to experiment with different seasonings and cooking times to achieve your preferred level of doneness.
Tips for Using Ninja Appliances for Keto Cooking
Mastering easy ninja appliance keto diet recipes opens up a world of quick, delicious meals. These versatile tools allow you to create low-carb dishes with ease, saving time and effort in the kitchen.
Using low-carb alternatives
Ninja appliances make it easy to swap high-carb ingredients for keto-friendly alternatives. You can use cauliflower rice instead of regular rice in risottos or as a side dish. Zucchini noodles, or “zoodles,” serve as an excellent pasta substitute in soups and Italian-inspired dishes.
The Ninja Foodi Pressure Cooker’s versatility allows you to quickly transform these low-carb ingredients into delicious meals.
For breading, almond flour or crushed pork rinds offer a crunchy texture without the carbs. Air fry chicken legs or grain-free breaded shrimp using these alternatives for a crispy finish.
The Ninja air fryer function ensures you get that satisfying crunch without compromising your keto goals. With 500+ low-carb recipes available in Ninja Foodi cookbook, you’ll never run out of ideas for tasty keto-friendly meals.
Experimenting with different flavors
Experimenting with different flavors can transform your keto meals from ordinary to extraordinary. You’ll discover exciting new taste combinations that keep your low-carb diet fresh and engaging.
Try adding herbs like rosemary or thyme to your air-fried chicken, or sprinkle some smoked paprika on your cauliflower rice for a Spanish-inspired twist.
Ninja appliances offer versatile cooking methods that allow you to explore a wide range of flavors. Use the pressure cooker function to infuse your dishes with intense spices, or the air fryer to create crispy, flavorful coatings without excess carbs.
For instance, you could prepare a zesty lemon-garlic butter sauce for your salmon steak, or create a smoky barbecue rub for your turkey meatloaf. These simple flavor additions can make your keto meals more enjoyable and satisfying, helping you stick to your low-carb lifestyle.
Perfecting cooking times
Mastering cooking times in your Ninja appliance can elevate your keto meals from good to exceptional. Each recipe in the keto Ninja foodi cookbook for beginners offers precise timing instructions, ensuring your dishes turn out perfectly every time.
You’ll find that pressure cooking times for keto-friendly meals are often shorter than traditional recipes, allowing you to whip up delicious low-carb dinners in record time.
For air fryer recipes, timing is crucial to achieve that crispy exterior while maintaining a juicy interior. The 50+ keto air fryer recipes in the collection provide specific cooking durations for various dishes, from chicken legs to herbed salmon.
These carefully calibrated times help you avoid overcooking or undercooking, resulting in restaurant-quality meals right at home. With practice, you’ll develop an intuition for cooking times, making your keto meal prep even more efficient.
Utilizing the correct cooking times not only ensures food safety but also helps preserve nutrients and flavors in your keto dishes. The Ninja Foodi Pressure Cooker keto cookbook includes 75 recipes with precise timing instructions, taking the guesswork out of preparing healthy, low-carb meals.
Next, let’s explore how to make the most of your Ninja appliance’s various functions for keto cooking.
Easy clean-up
Ninja appliances make keto cooking a breeze, especially when it comes to cleanup. Easy Ninja Appliance Keto Diet Recipes take advantage of these versatile kitchen tools, which often feature non-stick surfaces and dishwasher-safe components, cutting your post-meal cleanup time significantly.
You’ll appreciate how quickly you can rinse off the air fryer basket after making crispy buffalo wings or wipe down the pressure cooker pot following a hearty cauliflower lasagna. With less time spent scrubbing pots and pans, you can focus more on enjoying your delicious keto meals and less on kitchen chores.
For busy weeknights, this easy cleanup process is a game-changer. The Ninja Foodi Pressure Cooker, for example, offers one-pot cooking for many of its 75 keto-friendly recipes, minimizing the number of dishes you’ll need to wash.
Similarly, the air fryer function often requires little to no added oil, reducing greasy messes and making cleanup a snap. This efficiency aligns perfectly with the 500+ quick and easy keto recipes available in various Ninja appliance cookbooks, ensuring you can maintain your low-carb lifestyle without sacrificing your evenings to kitchen duty.
Utilizing all functions of the appliance
Ninja appliances offer a multitude of functions that can elevate your keto cooking game. With Easy Ninja Appliance Keto Diet Recipes, you’ll find air frying, pressure cooking, slow cooking, and grilling capabilities all in one device.
Exploring these various cooking methods allows you to create diverse keto-friendly meals without cluttering your kitchen with multiple gadgets. For instance, you can use the pressure cooker function to tenderize tough cuts of meat quickly, then switch to the air fryer mode to crisp up the exterior for a perfect texture.
Maximizing your Ninja appliance’s potential means experimenting with different cooking techniques for each recipe. Try using the sauté function to brown meat before pressure cooking, or the dehydrate option to make keto-friendly jerky snacks.
The versatility of these appliances enables you to prepare everything from cauliflower rice to air-fried buffalo wings, all while keeping your meals low-carb and keto-compliant.
Conclusion
Easy Ninja Appliance Keto Diet Recipes empower you to maintain a low-carb lifestyle without sacrificing flavor or time. These quick, delicious meals fit seamlessly into busy schedules, making healthy eating effortless.
You’ll discover a new world of culinary possibilities, transforming simple ingredients into mouthwatering keto-friendly dishes. With these recipes, you’re well-equipped to conquer your health goals while enjoying satisfying meals every night of the week.
FAQs
1. What are some quick keto recipes for the Ninja appliance?
Easy keto recipes for the Ninja include cauliflower rice stir-fry, zucchini noodle pasta, and chicken fajita bowls. These dishes cook quickly and fit a low-carb lifestyle.
2. How can I make keto-friendly meals on busy weeknights?
Prep ingredients ahead of time. Use the Ninja for one-pot meals. Choose recipes with five ingredients or less. Opt for quick-cooking proteins like fish or eggs.
3. Are there any keto desserts I can make in my Ninja appliance?
Yes. Try keto cheesecake bites, chocolate avocado mousse, or almond flour mug cakes. The Ninja’s versatility allows for various sweet treats without breaking ketosis.
4. What keto-friendly ingredients work well in Ninja appliance recipes?
Focus on low-carb vegetables, healthy fats, and quality proteins. Coconut oil, avocados, eggs, and leafy greens are excellent choices for Ninja keto recipes.
Last update on 2026-01-05 / Affiliate links / Images from Amazon Product Advertising API
*We may earn a commission for purchases made using our links. Please see our disclosure to learn more.


