How to Clean Ninja Slushi
If you’ve recently purchased a Ninja Slush Maker, you’re likely already enjoying the fun of making refreshing, icy slushies right at home. It’s a great way to treat yourself to a cool, delicious beverage whenever you want, and the machine makes it incredibly easy. But just like any appliance you use frequently, cleaning your Ninja Slushi maker is key to keeping it running smoothly and ensuring it lasts for years. While it may seem like a chore at first, trust me, once you get into the routine of cleaning it, the process becomes quick and simple.
Plus, regular cleaning helps maintain the machine’s hygiene, so you can enjoy your slushies without worrying about leftover residue or build-up. Once you understand the few essential steps, it’s a breeze, and before you know it, your Ninja Slush Maker will be ready to create your next batch of icy treats.
Key Takeaways
- Regular cleaning extends the lifespan of your Ninja Slushie Maker: Keeping the machine clean not only helps it function properly but also prevents the buildup of any residue that could affect its performance or the taste of your slushies over time. Regular maintenance ensures your machine stays in great shape, ready for countless slushy-making sessions.
- Disassemble the machine carefully and follow the manufacturer’s instructions: When cleaning your Ninja Slushie Maker, it’s important to carefully take apart the parts as outlined in the manual. This ensures that you don’t accidentally damage any components while also allowing you to reach all the areas that need cleaning. Following the manufacturer’s guidelines will help you clean the machine properly without missing any key parts.
- Use gentle cleaning agents to protect the machine: Avoid using harsh chemicals or abrasive cleaning products that could damage the machine or its parts. Opt for mild, non-toxic cleaners that are safe for kitchen appliances. This way, you preserve the quality of the machine and ensure it continues to work effectively for a long time.
- Clean the machine after every use for the best results: To prevent any leftover slushy mix or ingredients from hardening inside the machine, it’s best to clean it right after each use. This helps avoid residue buildup and ensures your slushies taste fresh every time. Regular cleaning also keeps your Ninja Slushie Maker free from bacteria or mold, providing a safe and hygienic slushy-making experience.
Recommended Cleaning Products
OXO Good Grips Bottle Brush

- Long, durable neck flexes for easy reach inside bottles, pitchers and carafes
- Dual-function nylon bristles: stiff upper bristles give hard-to-reach corners a serious scrub, while side bristles gently clean the sides of wine glasses and crystal without scratching
- Soft, non-slip handle provides a comfortable grip, even when wet
| Pros | Cons |
|---|---|
| Durable and Flexible Neck: The long, flexible neck easily reaches inside bottles, pitchers, and carafes, making cleaning effortless. Dual-Function Bristles: The stiff bristles tackle tough corners while the side bristles clean delicate items like wine glasses without scratching. Comfortable Grip: The soft, non-slip handle ensures a secure, comfortable grip, even when wet. | Requires Replacement Heads: While the heads are replaceable, you need to purchase refills separately. Size Might Be Too Large for Small Bottles: The brush may be too big for narrow-mouthed bottles. Higher Price Point: Compared to other bottle brushes, the OXO Good Grips option is a bit pricier. |
The OXO Good Grips Stainless Steel Bottle Brush features a durable, flexible neck and dual-function bristles to tackle even the most stubborn cleaning tasks. With its soft, non-slip handle and replaceable heads, this brush ensures easy, long-lasting use, making it perfect for cleaning water bottles, pitchers, and delicate glassware.
Mrs. Meyer’s Dish Soap

- REMOVES 48-HOUR STUCK-ON FOOD: Liquid Dish Soap powers through grease leaving your dishes and pans clean and bright.
- TESTED & TRUSTED: Mrs. Meyer’s products are made with essential oils, aloe vera, glycerin, and other thoughtfully chosen ingredients that are cruelty-free and Leaping Bunny Certified.
- GARDEN-INSPIRED SCENTS: Basil has a cool, crisp scent that is uplifting and grounding, familiar and exotic—all at one time. Such an inviting herbal smell, the garden’s friendly boost of green. With scent notes of: apricot leaves, eucalyptus, balsam, and patchouli.
| Pros | Cons |
|---|---|
| Biodegradable and Plant-Based: The soap contains plant-derived cleaning agents and other eco-friendly ingredients, making it a sustainable option for dishwashing. Effective Grease Cutting: This liquid dish soap cuts through grease efficiently, leaving dishes clean and bright. Cruelty-Free and Free of Harmful Chemicals: Mrs. Meyer’s products are cruelty-free and free from parabens, phthalates, and animal-derived ingredients. | Strong Scent: The basil scent may be overpowering for those sensitive to strong fragrances. Price: At $0.31 per fl oz, it might be more expensive than other dish soaps on the market. Limited to Dishwashing Use: This product is designed specifically for dishwashing and may not have versatility for other household cleaning tasks. |
Mrs. Meyer’s Clean Day Liquid Dish Soap in Basil features a biodegradable, plant-based formula that cuts through grease, leaving your dishes sparkling clean. With its uplifting and grounding basil scent, this dish soap is not only effective but also free from harmful chemicals and animal-derived ingredients. Cruelty-free and made with thoughtful ingredients, it’s a great choice for eco-conscious cleaning.
Microfiber Cleaning Cloths
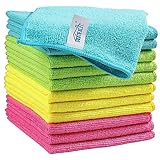
- Effective Streak-Free Cleaning: Clean kitchen countertops, windows, mirrors, bathroom surfaces, stainless steel, car interiors, glass, and other delicate surfaces with just water or your favorite cleaner—these microfiber cloths deliver streak-free, neat results with minimal effort, making daily cleanup fast and simple
- Lint-Free & Scratch-Safe: Soft to the touch and completely lint-free, these cloths won’t scratch or damage delicate finishes like glass, ceramic, coated metals, car paint, or polished surfaces—clean with confidence on everything from household appliances to auto trim and electronics screens
- Ultra-Absorbent for Spills, Polishing & Drying: Designed to quickly soak up liquids, grease, and grime, making them ideal for drying dishes, wiping spills, polishing stainless steel, buffing car surfaces, and tackling everyday messes around the house, garage, or workshop—efficient cleaning without extra effort
| Pros | Cons |
|---|---|
| Effective and Streak-Free Cleaning: These microfiber cloths offer efficient cleaning, leaving surfaces streak-free with just water or cleaner. Soft and Safe: The cloths are lint-free and gentle, ensuring they won’t scratch or damage delicate surfaces. Eco-Friendly and Reusable: With long-lasting durability, these cloths can be used repeatedly, helping reduce paper towel waste. | Size Limitations: At 11.5″ x 11.5″, the cloths might not be large enough for some bigger cleaning tasks. Requires Proper Care: To maintain their effectiveness, these cloths need regular washing and care. Color Fading: The vibrant colors may fade over time with repeated washing. |
The HOMEXCEL Microfiber Cleaning Cloths are ultra-absorbent, soft, and versatile cleaning towels, perfect for everything from wiping surfaces to drying dishes. With their lint-free and scratch-free design, they ensure safe cleaning without damaging finishes. Available in a pack of 12, these eco-friendly cloths are reusable and machine washable, making them a sustainable and efficient alternative to paper towels.
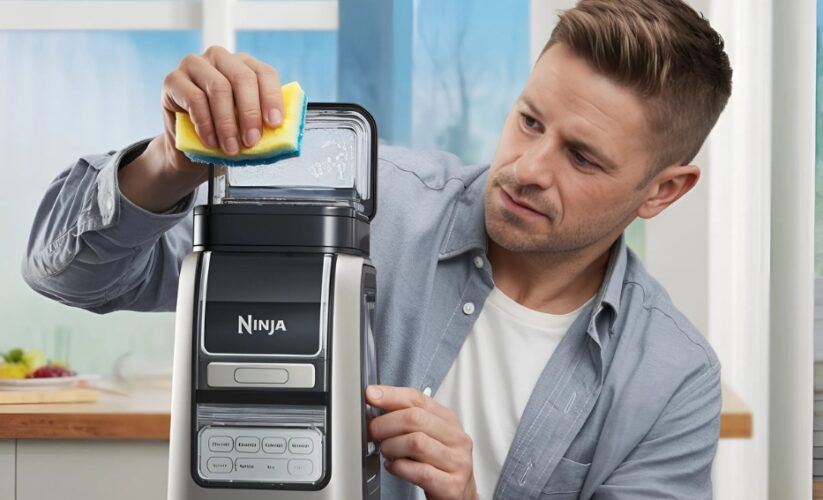
How to Clean Your Ninja Slushi Maker
Cleaning your Ninja Slushi Maker might seem like a hassle at first, but following a few simple steps can make it quick and easy. Let’s break it down into a straightforward process that will ensure your machine stays in top shape and ready for your next slushi adventure.
Step 1: Turn Off and Unplug the Machine
Before you dive into cleaning, make sure to power off the Ninja Slushi Maker and unplug it from the outlet. This is a crucial safety step. You don’t want the machine to accidentally turn on while you’re cleaning it, especially when handling sharp blades or water.
Step 2: Disassemble the Parts
Next, carefully take apart the removable parts of the machine. These usually include:
- The blending cup: The main part where all your slushi magic happens.
- The blades: Handle these with care as they are sharp.
- The lid: Often has small nooks and crannies where residue can hide.
- The spout (if your model has one): Make sure to remove this part to give it a thorough cleaning.
If you’re unsure how to safely disassemble any part of the machine, refer to the user manual for guidance. Taking apart the components properly will help you reach all the areas that need cleaning.
Step 3: Pre-Rinse the Parts
Rinse all the removable parts under warm water. This pre-rinse helps wash away any obvious slushy residue or leftover ingredients, making it easier to clean the parts more thoroughly in the next step.
Step 4: Clean the Removable Parts
- Blades: Use extra caution when handling the blades as they are sharp. It’s best to use a small brush or sponge to clean them with warm, soapy water. Make sure you remove any sticky or dried-on residue.
- Blending Cup: A bottle brush works wonders here. Scrub the inside of the blending cup thoroughly, paying attention to the sides and bottom to get rid of any stubborn sugar or slushi mix.
- Lid and Spout: Use a soft cloth or sponge to clean these parts. Be sure to clean any grooves or crevices carefully, as slushi mix can often get stuck there.
Step 5: Wipe Down the Base Unit
While you can clean the removable parts in water, never submerge the base unit. Instead, take a damp microfiber cloth and gently wipe down the base. Focus on any spills, smudges, or sticky areas. For dried residue, you can dampen the cloth with a little soapy water, but be sure not to get the base unit too wet.
Step 6: Rinse and Dry
Once you’ve scrubbed and cleaned all the removable parts, it’s time to rinse them thoroughly under running water to get rid of any soap residue. Then, dry them completely with a clean microfiber cloth. If you prefer, you can let them air-dry on a dish rack, but make sure they are fully dry before reassembling.
Step 7: Reassemble the Machine
After the parts have dried, carefully reassemble the Ninja Slushi Maker. Ensure all components are securely in place, especially the blades and blending cup. This way, the machine is ready for its next use without any issues.
Following these simple steps will keep your Ninja Slushi Maker in great condition and you’ll be able to enjoy fresh, clean slushies every time. Plus, with regular cleaning, your machine will last longer and continue performing at its best.
Tips for Maintaining Your Ninja Slushi Maker
Maintaining your Ninja Slushi Maker is all about keeping it clean and functioning properly for years to come. Here are some additional tips that can help you preserve its performance and ensure you get the best slushies every time:
Clean Immediately After Use
It’s tempting to put off cleaning, but the sooner you clean your Ninja Slushi Maker after use, the better. Any leftover slushy mix or sugary residues can harden and stick to the parts, making them difficult to clean later. Cleaning right away means the residue doesn’t have a chance to dry or set, which makes the whole process much easier and faster.
Use Gentle Cleaners
When it comes to cleaning your Ninja Slushi Maker, always opt for mild, non-abrasive cleaners. Harsh chemicals can damage the machine’s components, leading to wear and tear over time. A gentle, food-safe soap or a mild all-purpose cleaner will do the job without causing harm to your slushi maker. Avoid using strong disinfectants or abrasive pads that could scratch or degrade the surface.
Check the Manual
The user manual is your best friend when it comes to proper maintenance. While the steps above work for most models, always refer to the manual for any specific cleaning instructions or restrictions for your particular Ninja Slushi Maker. The manual might offer helpful tips on which parts are dishwasher safe, the best way to clean certain components, or other helpful hints for prolonging the machine’s lifespan.
Perform Deep Cleaning Regularly
Even with regular cleaning, it’s important to perform a deep clean every once in a while. About once a month, give your Ninja Slushi Maker a thorough cleaning using a mild appliance cleaner. This ensures that hard-to-reach areas where residue can build up, like crevices or around the motor base, stay free from grime and buildup. Deep cleaning also helps maintain the overall performance of your machine and ensures it continues to work smoothly.
Conclusion
Cleaning your Ninja Slushi Maker doesn’t have to feel like a chore. By making it part of your routine, you’ll not only keep the machine sparkling clean, but you’ll also help it run more efficiently and tastefully. A little effort now will lead to better-tasting slushies and a longer lifespan for your appliance. So, get in the habit of cleaning your machine after each use, perform deep cleanings regularly, and always use gentle cleaners. You’ll be able to enjoy worry-free slushie-making for years to come!
FAQs
1. Can I put the removable parts of my Ninja Slushi Maker in the dishwasher?
Most Ninja Slushi Maker models come with dishwasher-safe parts, but it’s always a good idea to check your specific model’s user manual to confirm. Some parts, like the blending cup or lid, might be labeled as dishwasher safe, while others might be more delicate and require hand washing. If you’re ever unsure, hand washing is usually the safest bet to protect the machine’s components and maintain their longevity.
2. What should I do if there’s a sticky residue on the base unit?
The base unit should never be submerged in water, so cleaning sticky residue requires a more careful approach. Use a damp microfiber cloth and a little bit of soapy water to gently scrub away any residue. Be cautious not to use excessive water or harsh, abrasive cleaners, as they can damage the machine’s exterior or electronics. Wipe the base unit thoroughly to ensure it’s dry before reassembling.
3. How often should I clean my Ninja Slushi Maker?
For optimal performance and hygiene, it’s important to clean your Ninja Slushi Maker after every use. Regular cleaning prevents any slushy mix or sugary residue from hardening, which could impact the taste of your future slushies and the machine’s overall functionality. The more consistent you are with cleaning, the longer your Ninja Slushi Maker will last and continue to perform at its best.
4. What if the blades are dull or damaged?
If you notice that the blades of your Ninja Slushi Maker have become dull or damaged, it’s essential to replace them as soon as possible. Dull blades won’t blend ingredients effectively, which can affect the texture and quality of your slushies. Contact Ninja’s customer service for guidance on ordering replacement blades, or check the manufacturer’s website for spare parts. Never use a damaged blade, as it could compromise the safety and efficiency of the machine.
5. Can I use vinegar to clean the machine?
Yes, you can use a diluted vinegar solution to clean some parts of your Ninja Slushi Maker, especially if you’re dealing with stubborn residue. Vinegar is a great natural cleaner and disinfectant. However, it’s important to rinse thoroughly afterward to ensure there’s no lingering vinegar smell or taste that could affect your slushies. A diluted solution (1 part vinegar to 3 parts water) works well for most cleaning tasks. Just be sure to check the user manual for any cleaning restrictions before using vinegar.
With this comprehensive guide, you’ll be able to clean your Ninja Slushi Maker like a pro and keep it in top shape for making countless delicious slushies. Regular care ensures your machine’s longevity, enhances performance, and guarantees a perfect slushie every time!
Last update on 2026-06-30 / Affiliate links / Images from Amazon Product Advertising API
*We may earn a commission for purchases made using our links. Please see our disclosure to learn more.